 Skip to content
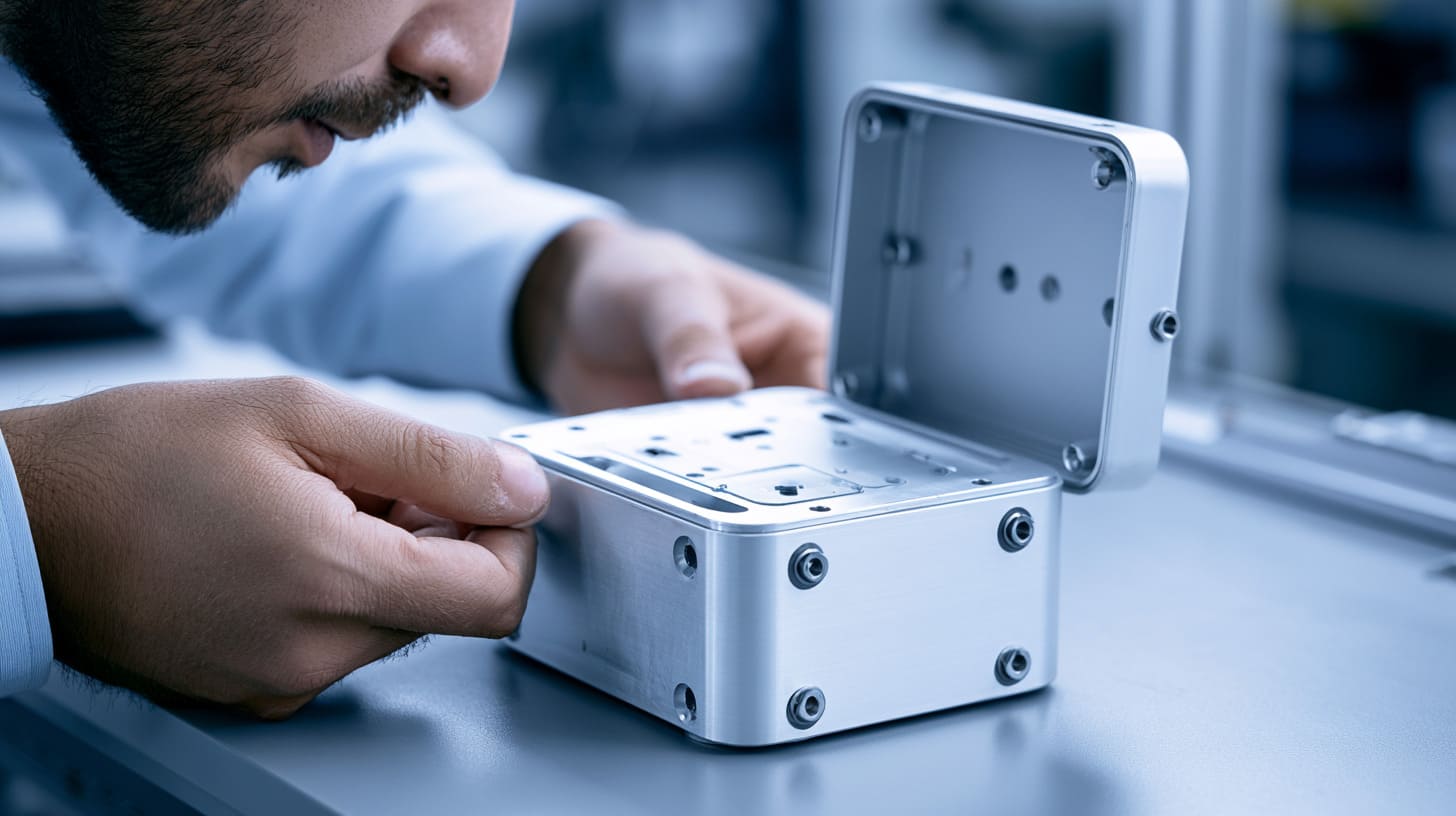
A small coating mistake does not look scary at the beginning.
It may only look like a few extra microns on the surface. It may sound like a normal finishing step. The buyer may say, “Just make it black powder coated.” The engineer may say, “The drawing is already confirmed.” The supplier may say, “No problem, we can do it.”
Then the sample comes back.
The cover cannot slide in smoothly. The screw feels tight. The PCB standoff is slightly off. The connector cutout looks fine by eye, but the real connector does not fit well. Nobody wants to hear this at the final stage, but this is exactly where coating thickness starts to show its real cost.
I have seen this many times in custom enclosure projects. Many customers care about the aluminum grade, wall thickness, CNC tolerance, MOQ, lead time, color, logo, and price. These are all important. But coating thickness is often placed at the bottom of the discussion, almost like a decoration choice.
That is risky.
For custom aluminum enclosures, sheet metal enclosures, and electronic device housings, coating thickness is not only about appearance. It affects the final size. It affects assembly. It affects corrosion protection. It affects grounding. It affects how the product feels in the customer’s hand.
The detail I always watch carefully is not only whether the finish looks beautiful, but whether the coated enclosure can still work the same way the engineer designed it on the drawing.
Why Coating Thickness Is Often Ignored in Enclosure Design
Many buyers think coating is the last step.
They may already spend a lot of time confirming the enclosure structure. They check the drawing. They check the holes. They check the logo. They check the sample cost. They check whether the supplier can offer OEM or ODM service. After all that, coating thickness may feel like a small technical detail.
But in real production, small details are where money likes to hide.
A product engineer may design the enclosure based on bare aluminum dimensions. The supplier may produce the raw part correctly. The CNC size may pass inspection. But after powder coating or anodizing, the finished part becomes slightly different. It is still the same enclosure, but it is no longer the same size in every critical area.
That is where trouble starts.
For B2B custom projects, the buyer is not only buying a metal box. He is buying a working part that must match his PCB, his product, his connectors, his screws, his brand, and his schedule. One small coating issue can slow down the whole project.
Core Judgment of This Article
I do not think coating thickness should be treated as a cosmetic detail.
I see it as an engineering decision.
If the enclosure is only a simple display shell with loose tolerances, coating thickness may not create big problems. But if the enclosure has PCB mounting points, screw threads, sliding covers, cable ports, grounding points, or branded appearance requirements, coating thickness must be discussed before mass production.
Here is the simple logic I use:
| Project Situation | Coating Thickness Risk | My View |
|---|---|---|
| Simple open box with loose holes | Low | Standard finish may be enough |
| Aluminum enclosure with sliding cover | Medium to high | Clearance must be checked |
| Sheet metal box with many PEM nuts | Medium | Hardware area needs control |
| Electronic enclosure with grounding needs | High | Masking may be needed |
| Outdoor enclosure | High | Protection thickness must be suitable |
| OEM branded enclosure | Medium to high | Color, gloss, and logo clarity matter |
Ignoring coating thickness does not always cause failure. But when it does, the cost usually appears late. And late problems are always more expensive.
A raw part problem is easier to fix. A finished part problem is painful.
Coating Thickness Is Not Just a Surface Finish Issue
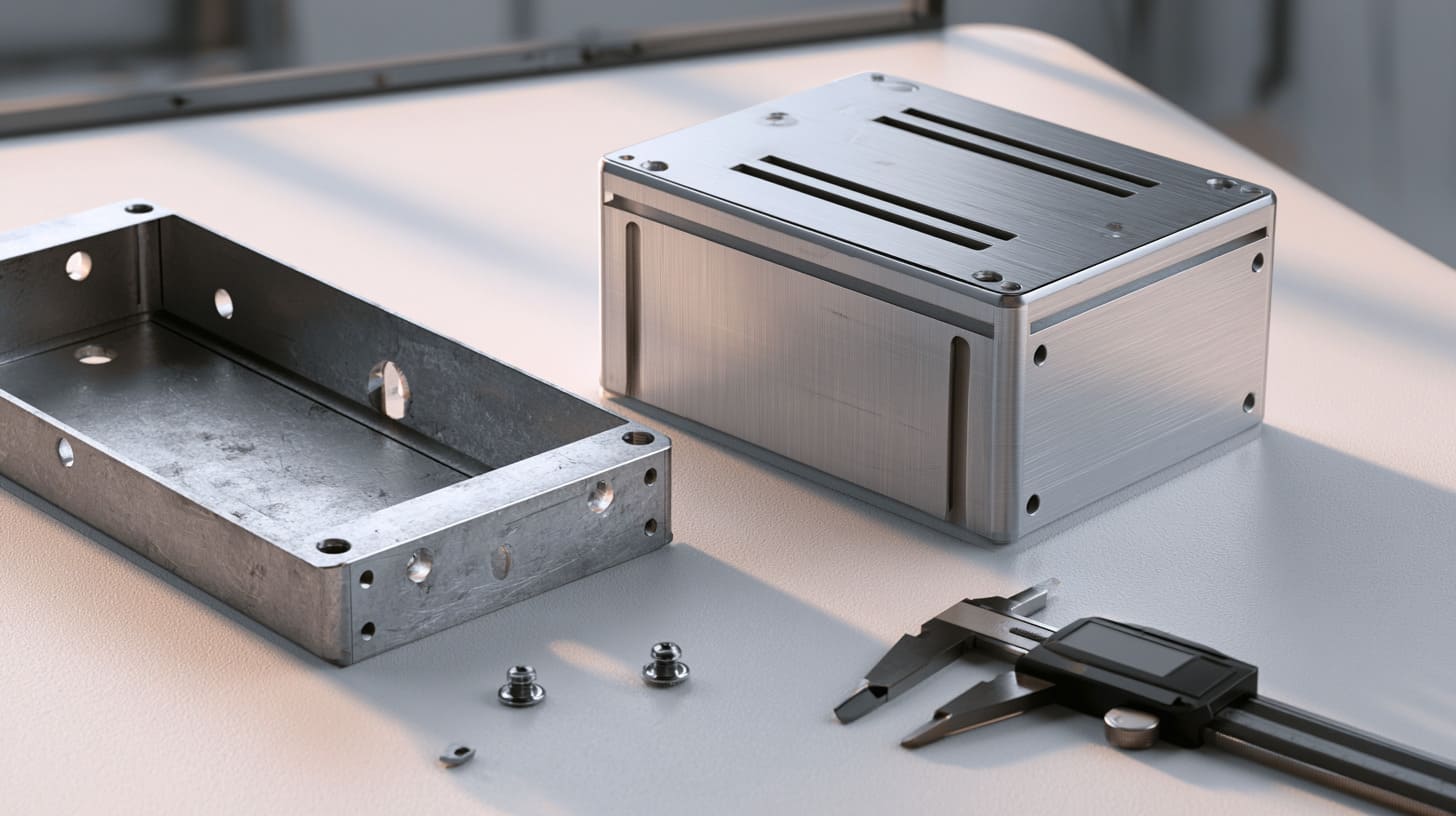
Many people look at coating like clothes.
They think the enclosure is already finished, and the coating is only the jacket. But in real manufacturing, coating is more like skin. It changes how the part feels, how it fits, how it resists the environment, and how it performs over time.
For a custom enclosure supplier, this is not a small topic. It is one of those details that separates a “looks okay” sample from a part that can be used smoothly in real assembly.
When I review a custom enclosure project, I do not ask only what color the customer wants; I also ask where the part must fit, where it must conduct, where it must slide, and where the coating cannot be allowed to create trouble.
It Changes the Final Size of the Enclosure
Powder coating adds a layer on top of the metal surface. Anodizing is different because it changes the aluminum surface itself. But both can affect the final part size.
This matters a lot when two parts fit together.
For example, if the top cover slides into a base, coating may build up on both sides. The buyer may think the change is tiny. But the real fit may feel completely different after coating.
A simple example:
| Feature | Before Coating | After Coating Risk |
|---|---|---|
| Screw hole | Correct size | Screw may feel tight |
| Sliding groove | Smooth movement | Cover may stick |
| Connector cutout | Looks accurate | Connector may not fit well |
| PCB post position | Matches drawing | Board may be difficult to mount |
| Threaded hole | Screw enters easily | Screw may jam |
This is why I always prefer to test the finished sample, not only the raw machined part.
A raw aluminum sample may lie to you. It looks correct. It measures correct. It feels correct. But the final customer does not use the raw part. He uses the coated part.
It Affects Both Function and Appearance
Coating thickness has two sides.
One side is protection. If the coating is too thin, the enclosure may not resist corrosion well. It may scratch too easily. It may fail earlier in humid, industrial, or outdoor environments.
The other side is fit and appearance. If the coating is too thick, it may reduce hole size, soften sharp details, create rough edges, or make assembly difficult.
So the question is not, “Should we make it thick or thin?”
The better question is, “What does this enclosure need to do?”
A branded desktop enclosure does not have the same needs as an outdoor control box. A Raspberry Pi style aluminum case does not have the same needs as a large sheet metal power enclosure. A small handheld device housing does not have the same needs as an industrial cabinet.
| Application | Main Concern | Coating Thickness Thinking |
|---|---|---|
| Indoor electronic enclosure | Appearance and assembly | Avoid excessive buildup |
| Outdoor control enclosure | Corrosion protection | Need stronger protection |
| Branded OEM enclosure | Color and logo quality | Control finish consistency |
| Precision CNC aluminum case | Tolerance and fit | Check all close-fit areas |
| Sheet metal enclosure | Edges and hardware | Watch corners, PEM nuts, threads |
Good finishing is not only beautiful. Good finishing is controlled.
It Should Be Treated as a Design Parameter
I like drawings that clearly show important finishing requirements.
A drawing that only says “black anodized” or “powder coated black” may not be enough for a serious OEM project. It gives the supplier a direction, but it does not show the risk areas.
For better control, the drawing should show:
- Coating type
- Color
- Texture or gloss
- Thickness range if needed
- Masking areas
- Thread protection
- Grounding points
- Critical fit areas
- Inspection requirements
This may sound like extra work. But it saves time later.
I have seen projects where the customer sent a very clean drawing. The raw part was easy to make. But the drawing did not show which surface needed electrical contact. After coating, the grounding area was covered. The part looked perfect, but the function was wrong.
That is a very expensive kind of perfect.
One buyer once told me, “The enclosure looks good, but my engineer still cannot use it.”
That sentence is painful. It means the supplier made a product that passed the eye test but failed the real test.
And that is why the next hidden cost usually starts from assembly.
Hidden Cost 1: Assembly Problems After Coating

Assembly problems are the most common hidden cost caused by coating thickness.
They are also the easiest to underestimate.
A buyer may receive samples and say, “The parts look nice.” Then the engineer starts assembling. The screws do not go in smoothly. The lid feels tight. The connector does not sit flat. The worker pushes harder. The coating gets scratched. Then everyone starts asking the same question:
“Why did this happen?”
This is where I become careful, because an assembly problem after coating usually means the design, finishing, and inspection were not connected well enough.
Holes Become Too Small
Coating builds up around holes.
This is easy to forget because holes look simple on a drawing. A circle is a circle. A slot is a slot. But in real production, coating does not care about how clean the drawing looks. It covers surfaces, edges, and inner walls.
For electronic enclosures, this can affect:
- Screw holes
- Mounting holes
- USB cutouts
- HDMI cutouts
- Cable glands
- Ventilation holes
- Switch openings
- LED windows
- Antenna holes
A small coating buildup may not matter on a large hole. But it can matter a lot on a tight connector opening.
| Hole Type | Common Problem After Coating | Possible Fix |
|---|---|---|
| Screw hole | Screw feels tight | Pre-adjust hole size or tap after coating |
| Connector cutout | Connector cannot pass smoothly | Add clearance before coating |
| Ventilation hole | Edge becomes thicker | Control coating and deburring |
| Mounting slot | Bolt cannot move freely | Mask or increase slot width |
| Threaded hole | Screw jams | Mask thread or chase thread after coating |
Some buyers may think the supplier can simply “clean the hole” after coating. Yes, sometimes we can. But that is rework. Rework costs time. Rework may damage the coating. Rework may also create inconsistent quality from piece to piece.
So the better way is to prevent the issue before coating.
Sliding or Interlocking Parts May Become Too Tight
Sliding covers are very sensitive to coating thickness.
This is common in extruded aluminum enclosures, Raspberry Pi style aluminum cases, and electronic project boxes. The structure may look simple. A lid slides into a groove. A panel fits into a rail. A small cover locks into the base.
But if both mating surfaces are coated, the clearance becomes smaller.
The part may still assemble, but it may not feel good. It may become rough. It may require force. It may scratch during use.
This is a small user experience problem at first. But for a branded product, it can become a big quality problem.
Think about it this way. If your customer opens the enclosure and the cover feels stuck, what does he think?
He does not think, “Maybe the coating thickness is a little high.”
He thinks, “This product feels cheap.”
That is the cruel part of manufacturing. A small technical detail becomes a customer feeling.
Extra Rework Increases Labor Cost
Rework is not only about money. It also creates stress.
When coated parts need rework, the production team may need to:
- Re-drill holes
- Re-tap threads
- Scrape coating from tight areas
- Polish rough edges
- Repair scratched surfaces
- Re-inspect parts
- Re-pack parts
Each step adds labor. Each step adds risk.
A project that looked profitable during quotation can become difficult during final assembly. The supplier may absorb the cost. The buyer may lose time. The customer may lose confidence.
Here is the real trade-off:
| Choice | Short-Term Result | Long-Term Risk |
|---|---|---|
| Ignore coating buildup | Faster quotation | Higher assembly risk |
| Add proper clearance | Slightly more design work | Smoother assembly |
| Mask critical areas | Extra finishing cost | Lower defect risk |
| Rework after coating | Solves urgent issue | May damage finish |
I never like to depend on rework as a normal production method. Rework is okay for emergency correction. It is not a good manufacturing plan.
And once assembly starts to fail, tolerance issues usually appear right behind it.
Hidden Cost 2: Tolerance Failure in Precision Enclosure Projects

Tolerance is one of those words that sounds boring until it costs money.
In custom enclosure projects, tolerance is not only a number on a drawing. It is the space where real parts survive. If the design gives the part enough space, production feels smooth. If the design is too tight, every process becomes a small battle.
Coating thickness makes this battle harder.
My first question is always simple: does the tolerance on the drawing refer to the raw part or the finished coated part? If nobody can answer that clearly, the project already has a risk.
Tight Tolerances Leave Little Room for Coating Buildup
Many product engineers design based on the final product function. That is correct. But sometimes the drawing does not clearly separate raw machining dimensions from post-finish dimensions.
This creates confusion.
For example, a CNC aluminum enclosure may need a hole diameter of 10.00 mm. If the drawing does not explain whether this is before or after anodizing, the supplier may machine the raw part to 10.00 mm. After coating, the hole may become slightly smaller. Now the connector fit becomes tight.
The drawing was followed. But the final part still creates trouble.
That is why tolerance must be connected to surface treatment.
| Area | Tolerance Sensitivity | Coating Risk |
|---|---|---|
| PCB mounting posts | High | Board alignment issue |
| Connector cutouts | High | Poor fit or interference |
| Sliding cover rails | High | Tight movement |
| Cosmetic outer surface | Medium | Appearance issue |
| Large open panels | Low to medium | Less critical |
| Internal grounding points | High | Electrical issue |
In precision projects, “almost correct” is not enough.
The part must fit the real product.
Critical Features Need Pre-Coating Compensation
Some features need special planning before coating.
These include:
- Threads
- Press-fit areas
- Hinges
- Countersunk holes
- PCB mounting points
- Sliding rails
- Snap-fit features
- Conductive contact areas
The solution is not always the same. Sometimes we increase clearance. Sometimes we mask the area. Sometimes we tap after coating. Sometimes we machine a little differently before finishing.
A good supplier should not only ask, “What color do you need?”
He should ask, “Where is the critical fit?”
That question sounds small. But it can save the whole project.
“Looks Correct” Does Not Mean “Fits Correctly”
Finished parts can be dangerous because they look complete.
The surface is nice. The color is even. The logo is printed. The packaging is ready. Everyone wants to ship.
But the real test starts when the customer assembles the product.
A finished enclosure should be inspected in the way it will be used. That means we should check:
| Inspection Item | Why It Matters |
|---|---|
| Screw assembly | Confirms thread and hole condition |
| PCB mounting | Confirms internal fit |
| Connector fit | Confirms cutout accuracy |
| Cover movement | Confirms sliding clearance |
| Grounding point | Confirms electrical contact |
| Surface check | Confirms appearance standard |
| Logo check | Confirms brand quality |
This is why sample approval is so important.
A buyer should not approve only the color. He should assemble the sample. He should insert the board. He should test the screws. He should try the connector. He should use the part like the end customer will use it.
The table does not lie. The screwdriver does not lie. The connector does not lie.
A beautiful part that cannot assemble is still a failed part.
And if the product will be used outdoors or in a harsh environment, another hidden cost starts to appear: poor corrosion protection.
Hidden Cost 3: Poor Corrosion Protection
Some buyers worry that the coating will be too thick. Other buyers only worry that the coating will be too expensive.
But there is another side.
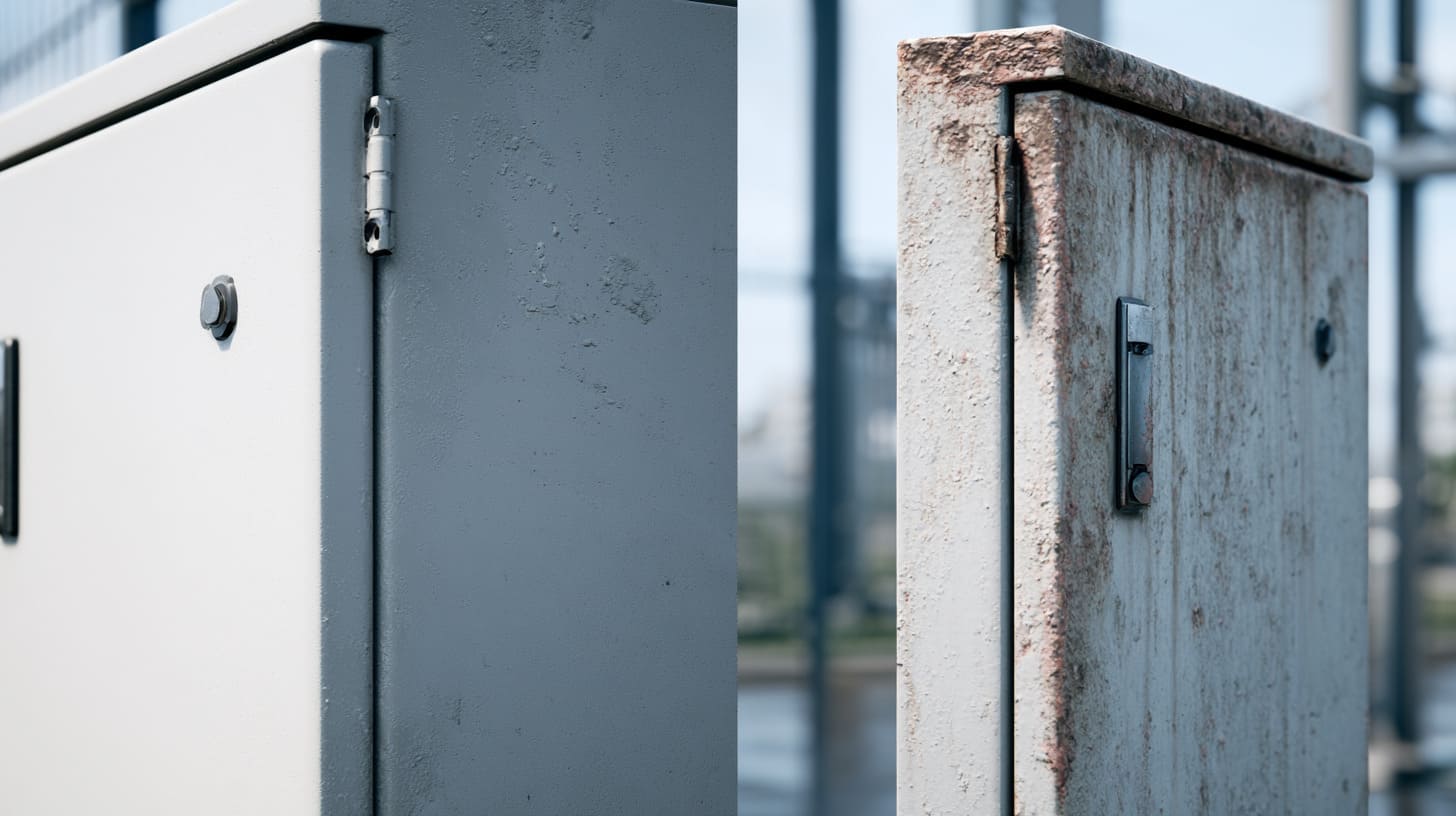
If the coating is too thin or not suitable for the environment, the enclosure may look fine at first and fail later. This is worse in many cases, because the problem appears after the product has already been sold or installed.
I do not judge coating cost only by the quotation; I judge it by where the enclosure will be used, how long it needs to last, and what happens if the surface fails in front of the final customer.
Too Thin Coating Reduces Long-Term Durability
An indoor electronic enclosure does not face the same environment as an outdoor industrial box.
A control enclosure in a dry office may only need a good-looking finish. But an enclosure used in a humid factory, outdoor cabinet, marine area, or high-dust environment needs stronger protection.
If the coating is too thin, the enclosure may face:
- Oxidation
- Rust on steel parts
- White marks on aluminum
- Peeling
- Surface fading
- Scratches
- Poor chemical resistance
- Shorter service life
This does not always happen immediately. That is why buyers may underestimate it.
The first batch may look good. The problem may appear months later. By that time, the enclosure is already with the end user. The buyer may need to replace parts. The brand may receive complaints.
That is not a finishing problem anymore. That is a trust problem.
Edge and Corner Coverage Is Often Weaker
Flat surfaces are easier to coat. Edges and corners are harder.
This matters because many enclosure failures start from edges, holes, corners, or cutouts. These are areas where coating may be thinner or less even.
For sheet metal enclosures, sharp edges can be especially risky. If the edge is not prepared well, coating coverage may be poor. The part may look okay from the front, but the weak point is already there.
| Area | Why It Is Risky | What I Check |
|---|---|---|
| Sharp edges | Coating may be thinner | Edge treatment and coverage |
| Cutout corners | Coating may not cover evenly | Radius and burr control |
| Vent holes | Buildup or weak coverage | Hole edge condition |
| Welded areas | Surface may be uneven | Grinding and pretreatment |
| Bottom corners | Easy to scratch during use | Packaging and coating strength |
This is why pretreatment and edge quality are part of coating quality.
A coating cannot fully hide poor preparation. It may cover the surface, but it cannot change bad manufacturing habits.
Wrong Thickness Creates False Savings
A lower coating cost can look attractive at the quotation stage.
This is especially true for price-sensitive projects. The buyer may compare two suppliers and choose the lower cost. That is normal. I also understand it. In B2B sourcing, cost control matters.
But a cheaper coating is not cheaper if it causes failure.
Here is the real cost picture:
| Cost Type | Visible at Quotation? | Appears Later? |
|---|---|---|
| Coating price | Yes | No |
| Rework cost | Sometimes | Yes |
| Warranty claim | No | Yes |
| Replacement shipping | No | Yes |
| Customer complaint | No | Yes |
| Brand damage | No | Yes |
| Project delay | Sometimes | Yes |
This is why I prefer honest coating discussions early. If the enclosure is for indoor use, we do not need to over-specify. If the enclosure is for outdoor or industrial use, we should not pretend a cheap finish is enough.
A good supplier should help the buyer spend money where it matters and save money where it does not.
The surface must protect the product. But it must also look right. And that brings us to another hidden cost: appearance problems.
Hidden Cost 4: Surface Appearance Problems

A surface problem is easy to see, but not always easy to explain.
The buyer may say, “This black looks different.” The engineer may say, “The part is functional.” The sales team may say, “But the customer cares about the look.” Everyone is right from his own angle.
For OEM and branded enclosures, appearance is not decoration. It is part of the product value.
When I check a branded enclosure, I pay close attention to whether the finish supports the brand image, because a customer may forgive a hidden internal mark, but he will not forgive a strange color on the outside surface.
Color and Gloss May Become Inconsistent
Coating thickness can affect color depth, gloss, and texture.
For powder coating, uneven thickness may create uneven surface feeling. For anodizing, surface preparation and processing control can affect color consistency. For painting, thickness and curing conditions can also affect appearance.
This matters a lot when the enclosure is sold as part of a finished product.
A customer may buy the same product many times. If one batch looks slightly different from another batch, he may feel the quality is unstable.
| Appearance Issue | Possible Cause | Why It Matters |
|---|---|---|
| Different black tone | Coating process variation | Brand inconsistency |
| Uneven gloss | Thickness or curing issue | Looks unprofessional |
| Orange peel texture | Powder coating control | Poor hand feel |
| Thin visible areas | Low coverage | Looks cheap |
| Color variation between parts | Batch difference | Hard to match assembly |
Some buyers only check function. Some only check color under office light. I think both are not enough.
For branded products, samples should be checked under normal use conditions. Hold it. Rotate it. Put it beside the old batch. Compare it with the customer’s product. That is how real users see it.
Thick Coating Can Hide Fine Details
A thick coating may sound stronger, but it can reduce detail.
This is common when the enclosure has:
- Small engraved logo
- Fine texture
- Sharp edges
- Thin slots
- Small text marks
- Decorative lines
- Precise corners
For a premium custom enclosure, these details matter. A slightly soft edge can make the product feel less precise. A filled engraving can make the logo less clean. A thick coating around small holes can make the design look heavy.
This is why “make it thicker” is not always good advice.
The better question is, “Which details must stay sharp?”
If the logo is important, we may need to choose the right process. Laser engraving, screen printing, UV printing, anodizing, and powder coating all behave differently. The best choice depends on the material, color, quantity, and brand style.
Thin Coating May Reveal Substrate Defects
A thin coating can show problems from the raw part.
If the aluminum has machining marks, scratches, sanding marks, or uneven welding areas, the coating may not hide them. In some cases, it may even make them easier to see.
This is why surface preparation matters.
A beautiful finish starts before coating.
| Before Coating Problem | After Coating Result |
|---|---|
| Deep scratch | Still visible |
| Uneven sanding | Uneven reflection |
| Poor deburring | Rough edge |
| Weld mark | Surface wave |
| Oil or dust | Coating defect |
| Bad polishing | Uneven appearance |
Some customers ask for a very high cosmetic standard but also want the lowest possible cost. I understand the pressure. But high cosmetic quality needs time. It needs preparation. It needs inspection. It needs communication about what is acceptable and what is not.
For example, an internal surface may not need the same standard as a front visible panel. A bottom surface may allow minor marks. A logo area should be cleaner. These decisions should be made early.
If all surfaces are treated as “premium visible surfaces,” cost goes up. If no surface is controlled, quality goes down.
Real manufacturing is about choosing the right standard for the right area.
And after appearance, there is one small area that can create many headaches: threads and fasteners.
Hidden Cost 5: Thread, Fastener, and Hardware Issues

Threads look small on a drawing, but they create big problems in assembly.
A coated thread may look fine from the outside. But once the screw enters, the worker feels the truth. If the screw jams, the assembly slows down. If the worker forces it, the thread may damage. If the coating cracks, the part looks bad.
Small hole. Big trouble.
For every enclosure with screws, inserts, standoffs, or hinges, I like to check the hardware areas before finishing, because one blocked thread can slow down the whole assembly line.
Threads May Become Difficult to Use
Coating buildup inside threaded holes is a common issue.
This is especially important for small electronic enclosures. Many of them use M2, M2.5, M3, M4 screws, or small PCB standoffs. These small threads do not have much extra space.
If coating enters the thread, the screw may not go in smoothly.
The problem may appear as:
- Screw feels too tight
- Screw cannot enter straight
- Thread strips
- Coating chips off
- Worker needs extra force
- Assembly speed becomes slower
- Defect rate increases
Possible solutions include:
| Method | Benefit | Trade-Off |
|---|---|---|
| Mask threaded holes | Keeps thread clean | Adds masking work |
| Tap after coating | Cleans thread | Adds labor and risk |
| Use larger clearance | Easier assembly | May affect design |
| Install hardware after coating | Cleaner hardware | Process must be planned |
| Use thread protection plugs | Good for volume production | Extra material and handling |
There is no single best method. It depends on the part structure, quantity, finish, and assembly needs.
But doing nothing is usually not a plan.
Inserts and Fasteners May Lose Accuracy
Sheet metal enclosures often use PEM nuts, rivet nuts, studs, hinges, brackets, and other hardware.
These parts need accurate fit.
If coating thickness is not considered, the hardware area may create problems. A PEM nut may be installed before coating. The coating may build around it. A hinge may not sit flat. A bracket may become slightly misaligned. A screw may not fully tighten.
In a simple enclosure, this may only cause small inconvenience. In a precision enclosure, it may create real assembly failure.
For example, if the customer needs to mount a PCB on several standoffs, all standoffs must align correctly. If one location has coating buildup or deformation, the board may bend slightly. That can damage the board or create stress during use.
This is why hardware is not only a purchasing item. It is part of the enclosure design.
Masking May Be Necessary
Masking adds cost.
Nobody likes extra cost. I understand that. But masking can prevent bigger problems.
Some areas should not be coated fully:
- Threads
- Grounding points
- Conductive surfaces
- Bearing surfaces
- Press-fit areas
- Tight sliding areas
- Certain sealing areas
- Label or adhesive areas
- Precision mounting faces
The buyer and supplier should agree on the masking plan before production.
| Area to Mask | Reason |
|---|---|
| Threaded holes | Avoid screw jamming |
| Grounding point | Keep electrical contact |
| Sliding rail | Prevent tight movement |
| Press-fit hole | Keep accurate fit |
| Gasket surface | Maintain sealing |
| Logo plate area | Improve bonding or marking |
The mistake is not masking. The mistake is unclear masking.
If the drawing does not show masking, the supplier may coat the full part. From the supplier side, that may look reasonable. From the customer side, it may be wrong. This is why communication matters.
A small note on a drawing can save hours of argument later.
Threads and hardware are mechanical problems. But in electronic enclosures, coating can create another kind of issue that is not always visible: grounding and EMC risk.
Hidden Cost 6: Electrical Grounding and EMC Risks

This is the part many non-engineering buyers may miss.
A coating can make a metal enclosure look better and last longer. But it can also block electrical contact. For many electronic products, that is a serious issue.
The enclosure may be aluminum. The structure may be metal. But if the contact points are covered with non-conductive coating, the electrical path may be broken.
When a customer tells me the enclosure is for RF, IoT, control equipment, or industrial electronics, I pay closer attention to conductive contact areas, because a beautiful coated shell is not helpful if it quietly blocks the function the design needs.
Coating Can Block Electrical Contact
Powder coating is usually not conductive. Anodizing can also reduce conductivity on the surface. This means metal-to-metal contact may not work well unless the right areas are left clean or treated correctly.
This matters for:
- Grounding points
- Shielding contact
- Panel joints
- Screw contact areas
- EMI gaskets
- Internal brackets
- Cable shield connections
If the enclosure needs electrical contact, the drawing should mark those areas clearly.
A common mistake is assuming that screws will automatically create contact. Sometimes they do. Sometimes they do not. It depends on the coating, screw type, contact pressure, surface condition, and assembly design.
For safer design, we should not depend on luck.
EMC Performance May Be Affected
EMC means electromagnetic compatibility.
In simple words, the device should not easily disturb other devices, and it should not easily be disturbed by outside electromagnetic noise.
Metal enclosures can help with shielding, but only when the conductive path is designed correctly. If coated seams, coated screw areas, or coated contact points block the path, the shielding effect may be reduced.
This is especially important for:
| Product Type | Why EMC May Matter |
|---|---|
| RF equipment | Signal protection |
| IoT gateways | Wireless stability |
| Industrial control boxes | Noise resistance |
| Power electronics | Safety and reliability |
| Medical or test devices | Stable performance |
| Communication equipment | Compliance needs |
The enclosure is not the whole EMC solution. But it is part of the system.
That is why coating thickness and masking should be discussed with the product engineer, not only the purchasing team.
Functional Areas Should Be Clearly Marked
A supplier cannot guess every electrical requirement.
The customer’s engineer knows the product function. The supplier knows the manufacturing process. The best result comes when both sides share information early.
For conductive areas, the drawing can include notes like:
- No coating on this surface
- Mask this grounding point
- Keep bare aluminum here
- Remove anodizing in this area
- Conductive gasket contact area
- Screw contact required
- Test electrical continuity after assembly
These notes make production clearer.
Without them, everyone may assume something different.
The engineer assumes the supplier understands. The supplier assumes full coating is required. The purchasing person assumes the drawing is complete. Then the finished sample arrives, and the problem becomes real.
At that point, the project does not only lose money. It loses time.
And time is often the most painful cost in custom enclosure projects.
Hidden Cost 7: Delays During Sampling and Mass Production

Delay is not always caused by slow production.
Sometimes delay is caused by unclear details.
A sample can be machined on time. It can be coated on time. It can be packed on time. But if coating thickness creates assembly problems, the project still becomes late.
This is the part buyers hate most. They already promised their own customer a delivery date. Their product launch may depend on the enclosure. Their engineer may be waiting. Their sales team may be waiting. Their end user may be waiting.
I always treat coating confirmation as a schedule issue, not only a technical issue, because a tiny finishing mistake can easily steal one or two weeks from a project.
Problems Often Appear After the First Finished Sample
The first sample is where many hidden problems appear.
Before coating, the raw enclosure may look correct. The dimensions may pass inspection. The buyer may feel confident.
After coating, the story may change.
Common first-sample problems include:
- Cover too tight
- Screw hole too small
- Thread blocked
- Logo not clear
- Color not matching
- Surface too rough
- Connector opening too tight
- Grounding point coated
- Assembly scratch marks
- Uneven coating around edges
This is why first samples should be finished exactly like mass production.
A raw sample can help check structure. But it cannot fully check finish-related risk.
For custom OEM and ODM projects, I prefer a two-step sample strategy when needed:
| Sample Stage | Purpose |
|---|---|
| Raw sample | Check structure, main dimensions, and assembly concept |
| Finished sample | Check coating, final fit, surface, logo, and function |
Not every project needs both. But for precision or branded enclosures, this can reduce risk.
Revisions Delay the Project Timeline
Once a coated sample fails, revision may be needed.
This can include:
- Updating the drawing
- Changing hole clearance
- Adding masking areas
- Adjusting coating thickness
- Changing surface treatment
- Reworking tooling or fixtures
- Re-sampling
- Re-checking assembly
- Reconfirming color and logo
Each step takes time.
And if the buyer is in Europe, North America, Japan, or Korea, communication time zone differences can make it slower. One question may take a day to answer. One drawing revision may take two days to confirm. One sample shipment may take several days.
This is why clear details before production matter.
A small missing note can become a long email chain.
Communication Gaps Increase Risk
Many coating problems are not caused by bad intention.
They are caused by assumptions.
The buyer assumes the supplier will know the coating thickness. The supplier assumes the buyer does not have special requirements. The engineer assumes the purchasing person has explained the critical areas. The sales person assumes the drawing is complete.
Assumptions are expensive.
Here is how I like to reduce this risk:
| Question | Why I Ask It |
|---|---|
| Is this part used indoors or outdoors? | To choose suitable protection |
| Are there any tight-fit areas? | To control coating buildup |
| Are any holes threaded? | To prevent screw problems |
| Does it need grounding? | To plan masking |
| Is the color matched to another part? | To control appearance |
| Will the customer assemble PCB inside? | To check mounting points |
| Is this sample for function or appearance? | To avoid wrong approval |
These questions may seem basic. But basic questions save real projects.
A good supplier should not wait for problems. He should ask before the problem becomes visible.
Now let’s move from hidden costs to practical control. The first step is how engineers should specify coating thickness.
How Engineers Should Specify Coating Thickness

Engineers do not need to write a book on every drawing.
But they should write enough information so the supplier can make the part correctly.
A vague surface finish note may be enough for a simple part. But for a custom electronic enclosure, it may be too weak. The more critical the part is, the more specific the finish note should be.
When I see a drawing with only “black finish” written on it, I do not feel relaxed; I feel there is still a conversation missing.
Define the Surface Finish Clearly
The first step is to define the finish type.
Do not only say “black.” Black can mean many things.
It can be black anodizing, black powder coating, black painting, black hard anodizing, black electrophoresis, or another finish. Each one has different thickness, appearance, cost, and performance.
| Finish Type | Common Use | Main Concern |
|---|---|---|
| Anodizing | Aluminum enclosures | Color and surface hardness |
| Hard anodizing | Wear-resistant aluminum parts | Thickness and dimension change |
| Powder coating | Aluminum or steel enclosures | Protection and appearance |
| Painting | Cosmetic surfaces | Color and gloss control |
| Plating | Conductive or protective use | Process and material match |
| Brushing + anodizing | Premium aluminum look | Surface preparation |
The drawing should also include appearance needs, such as:
- Matte
- Glossy
- Fine texture
- Rough texture
- Color code if needed
- Logo method
- Visible surface standard
This avoids confusion.
A buyer may think “black” is simple. But one black can look warm. Another black can look cold. One black may be matte. Another may be semi-gloss. One black may match the customer’s product. Another may look wrong beside it.
Add Thickness Range Instead of Vague Requirements
If thickness matters, write a range.
A practical range gives the supplier a target and gives the inspector a standard. It also helps both sides avoid arguments later.
For example, instead of writing:
- “Powder coated black”
It may be better to write:
- “Black powder coating, matte texture, coating thickness to be confirmed based on fit areas”
- “Critical holes must remain functional after coating”
- “Threaded holes to be masked or cleaned after coating”
- “Finished part dimensions must meet drawing tolerance”
The exact thickness depends on the process and requirement. The main point is not to blindly copy a number. The main point is to connect thickness with function.
| Bad Requirement | Better Requirement |
|---|---|
| Black anodized | Black anodized, visible surfaces must be uniform |
| Powder coated | Powder coated, protect threaded holes |
| Finish as sample | Match approved sample for color and texture |
| No scratches | Define visible surface standard |
| Standard coating | Specify use environment and critical areas |
Clear does not mean complicated.
Clear means the supplier knows what matters.
Mark Critical Areas on the Drawing
A drawing should show where coating thickness can create risk.
Important areas include:
- Threads
- PCB mounting points
- Connector cutouts
- Sliding areas
- Grounding points
- Hinges
- Press-fit features
- Sealing surfaces
- Logo areas
- Customer-visible surfaces
I like drawings with simple notes and arrows. They are much easier to follow than long emails.
For example:
| Drawing Note | Meaning |
|---|---|
| Mask this area | Do not coat this surface |
| Keep thread clean | Protect or clean threaded hole |
| Critical fit area | Control coating buildup |
| Conductive contact required | Keep electrical contact |
| Cosmetic surface A | Higher appearance standard |
| Internal surface B | Normal standard acceptable |
This helps production workers, QC workers, and the buyer speak the same language.
A drawing is not only for engineers. It is also for the people who make the part, coat the part, inspect the part, and assemble the part.
Good drawings reduce talking. Bad drawings create talking.
And if the buyer is not sure how to specify everything, then the discussion with the supplier becomes even more important.
How Buyers Should Discuss Coating Thickness With Suppliers
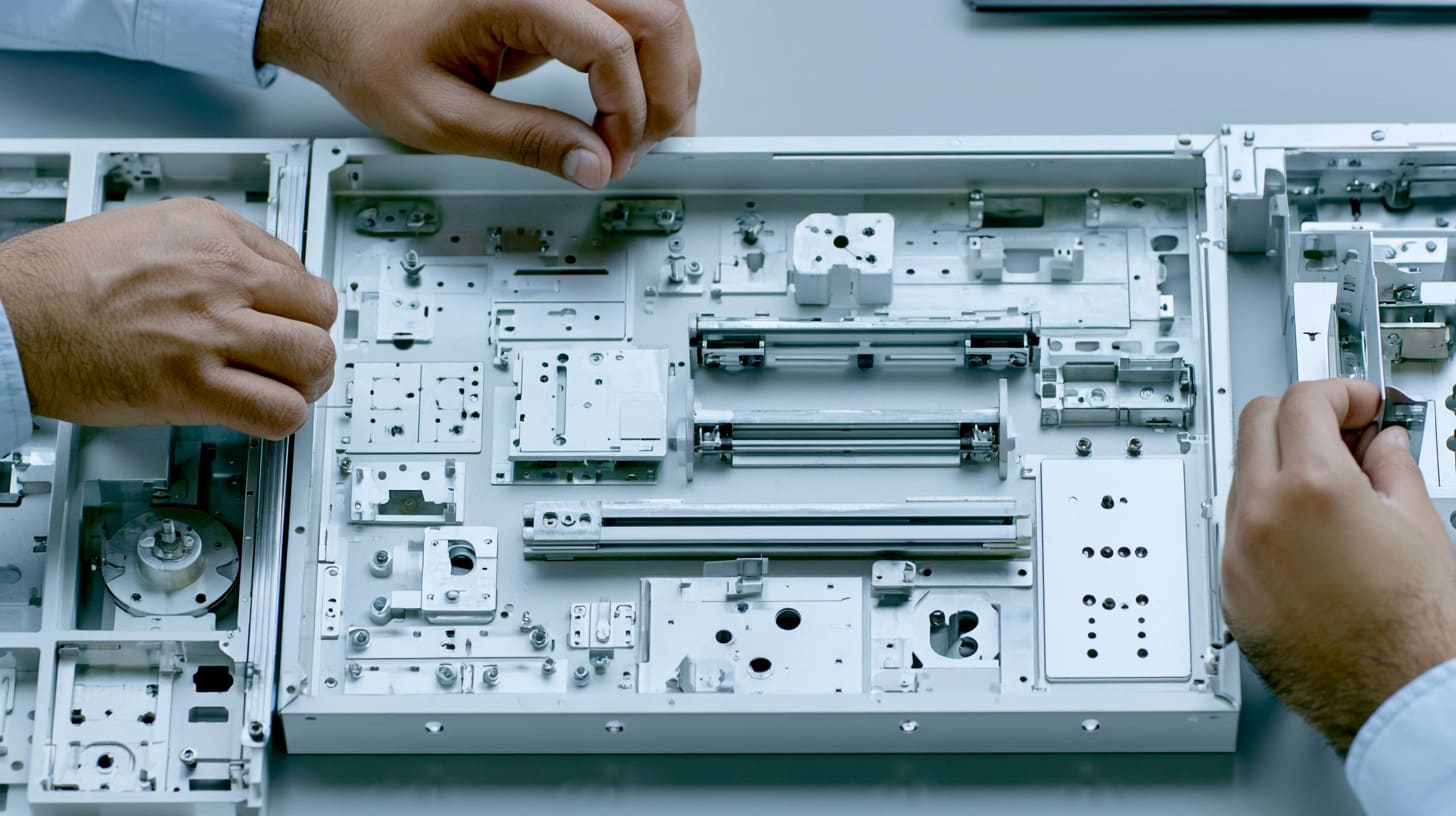
Many buyers do not need to be coating experts.
That is okay.
A good supplier should help the buyer ask the right questions. But the buyer should also share enough product information. If the supplier only sees a drawing and does not understand how the enclosure will be used, he may miss important risks.
I do not expect every buyer to know the exact coating thickness, but I do expect a serious project to explain the use environment, assembly method, and critical parts before quotation.
The end-use environment changes the finishing decision.
An enclosure used in a clean office is different from one used near a machine, on a wall outdoors, inside a vehicle, near the sea, or in a humid factory.
Buyers should tell the supplier:
- Indoor or outdoor use
- Dry or humid environment
- Industrial or consumer product
- Temperature condition
- Chemical exposure
- UV exposure
- Expected service life
- Handling frequency
- Shipping and packaging needs
This helps the supplier recommend the right finish.
| Environment | Possible Finish Concern |
|---|---|
| Indoor office | Appearance and scratch resistance |
| Outdoor wall-mounted product | Corrosion and UV resistance |
| Factory equipment | Dust, oil, and impact |
| Marine area | Strong corrosion risk |
| Portable device | Wear and hand feel |
| High-temperature area | Coating stability |
Without this information, the supplier may quote the cheapest normal finish. That may win the price comparison, but it may not serve the product well.
Confirm Functional Requirements Before Quotation
Before quotation, the buyer should confirm the functional needs.
This is not only about price. It is about avoiding later cost.
Important questions include:
| Requirement | Why It Matters |
|---|---|
| How will the enclosure be assembled? | To check fit and screw access |
| Is there a PCB inside? | To check standoffs and clearance |
| Are there connectors? | To control cutout size |
| Are there moving parts? | To control sliding areas |
| Is grounding needed? | To plan masking |
| Is EMC important? | To protect conductive contact |
| Is logo required? | To choose the right marking process |
| Is color matched to another product? | To avoid appearance mismatch |
This may sound like a lot. But for custom OEM and ODM projects, these are normal questions.
I would rather ask ten simple questions before production than answer one angry email after delivery.
Ask for Sample Validation
A finished sample should be tested like a real product.
Do not only look at it.
Use it.
Install the PCB. Put in the screws. Insert the connectors. Slide the cover. Check the logo. Touch the surface. Compare the color. Test grounding if needed.
Here is a simple sample validation checklist:
| Check Item | Pass Standard |
|---|---|
| Overall appearance | Color and texture match approved sample |
| Assembly | Parts fit without forcing |
| Screws | Screws enter smoothly |
| Threads | No jamming or stripping |
| Connectors | All ports fit correctly |
| Sliding areas | Movement is smooth |
| Surface | No major scratches or coating defects |
| Logo | Clear and correctly positioned |
| Grounding | Conductive areas work as needed |
| Packaging | Coating protected during shipping |
Buyers often want to move fast after receiving the sample. I understand that feeling. But a rushed approval can be expensive.
One careful sample check can save one full batch.
Once the discussion is clear, the design can be adjusted in a practical way. That is where simple design habits help a lot.
Practical Design Suggestions for Custom Enclosures

Good enclosure design is not only about making the part strong.
It is also about making the part manufacturable.
A beautiful 3D design may look perfect on screen. But metal has thickness. Coating has thickness. Screws need space. Workers need access. Packaging needs protection. Real products live in the real world, not only in CAD software.
When I review a design, I like to look for the small places where two surfaces meet, because that is where coating thickness quietly becomes a problem.
Leave Enough Clearance for Coated Parts
Clearance is one of the easiest ways to reduce coating risk.
If two parts need to fit together, do not design them too tight unless there is a clear reason. A little extra clearance can make assembly much smoother.
This matters for:
- Sliding covers
- Snap-fit structures
- Front and rear panels
- Connector cutouts
- Internal brackets
- PCB supports
- Cable openings
- Hinges
The key is balance.
Too much clearance makes the product feel loose. Too little clearance makes it hard to assemble. Good design sits between these two problems.
| Design Choice | Risk |
|---|---|
| Too tight | Coating causes interference |
| Too loose | Product feels cheap or unstable |
| No coating allowance | Final part may not fit |
| Proper clearance | Better assembly and lower rework |
For a custom enclosure, I prefer to confirm critical dimensions with the customer before production. If the customer has a real PCB, connector, or internal part, it is better to check against real parts, not only drawings.
Use Masking for Critical Surfaces
Masking is not always needed. But when it is needed, it should be clear.
Critical surfaces should be protected from coating if coating will affect function.
Common masking areas include:
- Threads
- Grounding points
- Conductive contact areas
- Sliding rails
- Press-fit holes
- Bearing surfaces
- Gasket surfaces
- Tight mounting faces
Masking can be done with plugs, tapes, caps, fixtures, or other methods. The exact method depends on the part and process.
The important thing is that masking must be agreed before production.
| Masking Area | If Not Masked |
|---|---|
| Threaded hole | Screw may jam |
| Grounding point | Electrical contact may fail |
| Sliding rail | Cover may feel tight |
| Press-fit hole | Insert may not fit |
| Gasket face | Sealing may be affected |
| Logo bonding area | Adhesion may be poor |
A buyer may think masking is a small cost. But for mass production, masking adds handling time. So we should not mask everything. We should mask what matters.
That is the real design decision.
Avoid Over-Specifying Thickness
Some customers think thicker coating always means better quality.
I do not agree.
Thicker coating may improve protection in some cases. But it may also create fit issues, reduce detail, affect threads, and change appearance. For some precision enclosures, too thick can be worse than too thin.
The best coating is not the thickest coating.
The best coating is the coating that matches the product’s real use.
| Situation | Better Thinking |
|---|---|
| Outdoor use | Focus on protection |
| Tight assembly | Focus on fit |
| Branded product | Focus on appearance consistency |
| Grounding required | Focus on conductive contact |
| Low-cost indoor box | Avoid unnecessary over-specification |
| Precision CNC case | Balance thickness and tolerance |
This is where supplier experience matters.
A good supplier should not simply say yes to every requirement. He should explain the trade-off. If the customer asks for a very thick coating on a tight sliding structure, the supplier should warn him. If the customer wants the cheapest finish for outdoor use, the supplier should also warn him.
This is not being difficult. This is being responsible.
For OEM and ODM projects, this responsibility becomes even more important.
Why This Matters More for OEM and ODM Enclosure Projects

OEM and ODM enclosure projects are different from standard stock products.
A standard product has already been tested many times. The structure is fixed. The finishing method is known. The risk is lower.
A custom project is different. The customer’s board may be new. The connector layout may be special. The logo may be new. The color may need to match a brand. The quantity may start small and then grow. The schedule may be tight.
For custom OEM projects, I care more about coating details because the enclosure is not just a shell; it becomes part of the customer’s product identity and product reliability.
Custom Projects Have Less Room for Mistakes
In OEM and ODM projects, the enclosure often needs to match many things at the same time:
- PCB size
- Connector position
- Cable direction
- Heat dissipation
- Mounting method
- Brand logo
- Product color
- Packaging
- User assembly
- End-use environment
A small coating issue can affect many of these areas.
For example, if a Raspberry Pi style aluminum case has coating buildup near the USB opening, the port may become difficult to access. If the lid is too tight, the user may scratch the case while opening it. If a grounding point is coated, the product engineer may need to redesign the internal contact.
This is why custom projects need early review.
| Custom Project Detail | Coating Thickness Impact |
|---|---|
| Board fit | Standoff and clearance issue |
| Port layout | Connector interference |
| Logo engraving | Detail clarity |
| Sliding cover | Assembly feel |
| Thermal design | Contact surface condition |
| Grounding | Conductive path |
| Packaging | Surface scratch risk |
A custom enclosure is like a suit.
A standard box only needs to be close. A custom enclosure needs to fit.
Brand Customers Care About Both Function and Appearance
Brand buyers care about the full experience.
They want the enclosure to protect the product. But they also want it to look right. They want the logo to be clean. They want the color to be stable. They want the customer to feel quality when holding the product.
This is not vanity. This is business.
If the enclosure looks poor, the final product feels cheaper. If the product feels cheaper, the buyer may lose pricing power. If the buyer loses pricing power, the small saving on coating may become meaningless.
Here is how I see it:
| Buyer Concern | Why Coating Matters |
|---|---|
| Brand image | Surface finish is visible |
| Customer trust | Good finish feels reliable |
| Online sales | Product photos show surface quality |
| Repeat orders | Batch consistency matters |
| Local market competition | Appearance supports higher price |
For Amazon, Facebook shop sellers, distributors, and local product brands, appearance can affect conversion. The customer cannot see the internal engineering first. He sees the outside.
The enclosure makes the first impression.
Early Engineering Support Reduces Total Cost
A good enclosure supplier should do more than produce parts.
He should help review the risk.
For coating thickness, early engineering support may include:
- Reviewing fit areas
- Suggesting clearance changes
- Confirming masking areas
- Checking thread protection
- Advising suitable finish
- Making finished samples
- Testing assembly
- Checking logo process
- Packing to protect the coating
This is not extra talking. This is cost control.
Many customers come to China or Vietnam because they want a competitive price. That makes sense. But a low price without engineering support can become expensive later.
The better target is not the lowest unit price.
The better target is the lowest total project cost.
That includes sample cost, revision cost, production cost, inspection cost, shipping cost, delay cost, and after-sales cost.
This is why I believe coating thickness should be discussed early, even if the customer does not mention it first.
Conclusion

Coating thickness looks like a small topic.
But after working on many custom enclosure projects, I do not see it as small anymore.
I see it as one of those quiet details that can decide whether a project feels smooth or painful. It can affect assembly. It can affect tolerance. It can affect corrosion resistance. It can affect color. It can affect threads. It can affect grounding. It can affect delivery time. It can even affect how the final customer judges the product.
My view comes from real project thinking, not from a textbook.
I have seen buyers focus only on price and color, then face assembly problems after coating. I have seen samples look beautiful but fail when the PCB was installed. I have seen small holes become tight after finishing. I have seen grounding areas get coated because nobody marked them on the drawing. None of these problems are strange. They are common. And most of them can be avoided.
That is why I always prefer to discuss coating thickness early.
Not because I want to make the project complicated.
I do it because I want the project to stay simple later.
For product engineers, my suggestion is clear: do not treat coating as the final decoration step. Treat it as part of the design.
For buyers, my suggestion is also clear: when you send a custom enclosure RFQ, share the use environment, assembly method, critical holes, grounding needs, logo requirements, and surface expectations. The more clearly we understand your product, the better we can help you avoid hidden costs.
At MaidaTech, we work on custom aluminum enclosures, plastic enclosures, sheet metal enclosures, Raspberry Pi style cases, and other electronic device housings. Many of our customers are product engineers, procurement specialists, wholesalers, and brand owners. They do not only need a box. They need a reliable enclosure that fits their product, protects their electronics, supports their brand, and arrives on time.
If you are planning a custom enclosure project, you can send us your drawing, sample, logo file, or design idea. We can help check the material, structure, surface finish, coating thickness risk, masking areas, and production method before mass production.
A few careful questions at the beginning can save many expensive problems at the end.







