 Skip to content
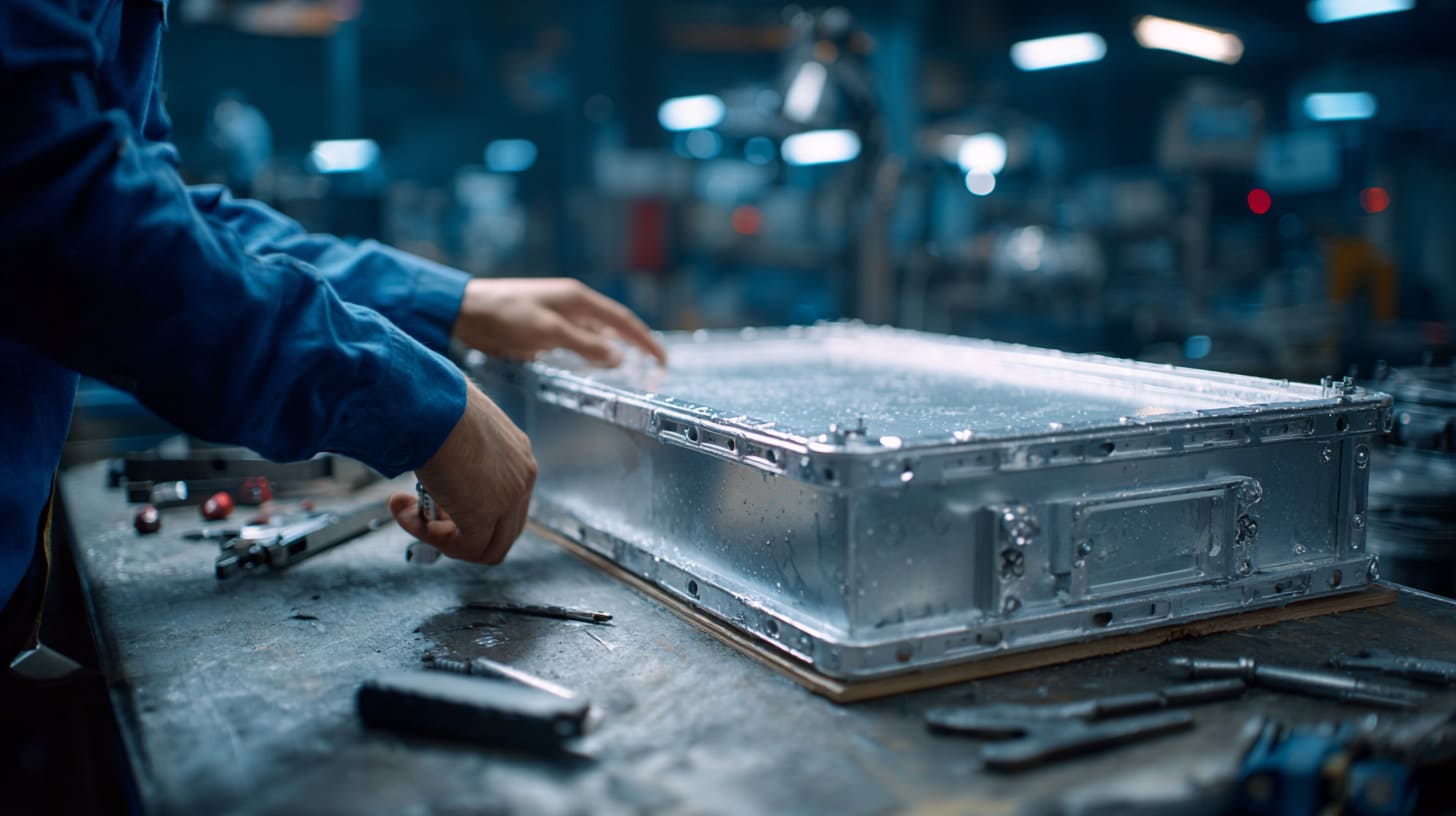
A waterproof enclosure project usually does not fail on the testing table.
That sounds strange, I know.
Most buyers imagine the failure happens during IP testing. Water is sprayed. The enclosure leaks. Everyone stares at the test report like it is a final exam paper with a big red mark on it.
But from what I have seen in real custom enclosure projects, the problem often starts much earlier.
It starts when someone says, “We need IP65,” but nobody explains where the enclosure will be installed.
It starts when a drawing shows three connector holes on the side panel, but nobody checks if the gasket still has enough pressure after the cutouts are added.
It starts when the buyer asks for a lower cost, the supplier changes the gasket material quietly, and both sides think the design is still “almost the same.”
Almost.
That word has ruined many waterproof projects.
I once worked on a custom aluminum enclosure project where the sample looked very good. The CNC machining was clean. The surface treatment was nice. The logo was printed well. The buyer liked the appearance immediately. But when we reviewed the structure again, I felt uneasy about the cable entry side. There were too many openings. The cover screws were far from one corner. The gasket path looked simple on the drawing, but in real assembly, that corner would not get even pressure.
The buyer’s first thought was simple: “Can we just test IP65?”
My answer was not very exciting, but it was honest: testing can tell us whether the current sample leaks, but it cannot fix a weak design logic.
That is the whole point of this article.
Waterproof enclosure problems are not only about IP ratings. They are also about design habits, sealing surfaces, cable glands, thermal behavior, assembly control, and the dirty little surprises of real working sites.
A lab test is clean. A factory floor is not.
A test report is short. A product life cycle is long.
A sample is controlled. Mass production is full of small variations.
I care about this topic because I work with OEM and ODM buyers who often need custom aluminum enclosures, plastic enclosures, sheet metal enclosures, and Raspberry Pi-style project cases. Many of them are smart engineers. They know their own product very well. But waterproof enclosure design sits in a tricky space. It looks simple from the outside, but the details are hiding under the cover, around the gasket, inside the cable entry, and behind every screw.
Before I agree with a waterproof design, I always ask myself one uncomfortable question: if this enclosure passes the first test, will it still behave well after shipping, installation, vibration, heat, and maintenance?
That question saves money.
It also saves time, arguments, and a lot of late-night emails.
So let’s talk about why most waterproof enclosure problems start before IP testing, and how buyers can catch them earlier.
Why Do Most Waterproof Enclosure Problems Begin During Design?
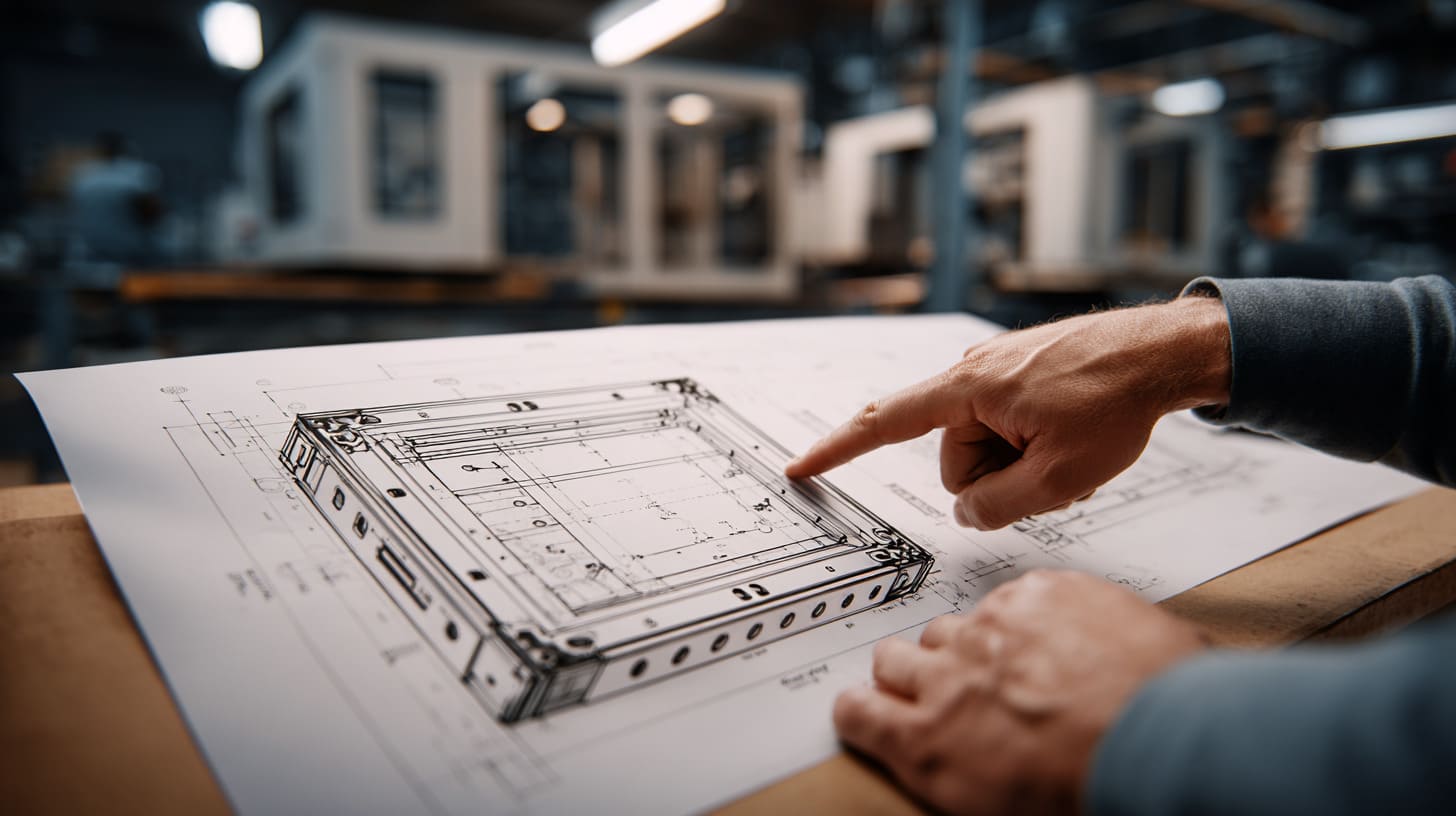
Design is where waterproof performance is born.
Testing is only where it gets exposed.
This is the part many people miss. They treat waterproofing like a sticker. They think they can finish the enclosure structure first, then add “IP65” or “IP67” at the end like a badge on a product page.
But waterproof design does not work like that.
A waterproof enclosure is a system. The cover, base, gasket, screws, cable glands, wall thickness, cutouts, surface flatness, material, and installation method all work together. If one part is weak, the whole system becomes weak.
I have seen drawings that look perfect at first glance. Nice shape. Good thickness. Clean holes. Clear dimensions. But after looking closer, I notice the problem: the gasket path is too close to a screw boss. Or the cover has a long flat area without enough screw pressure. Or the side panel has a large connector opening too close to the corner.
At that moment, the risk is already there.
The enclosure has not been machined yet. No water has touched it. No IP test has started. But the failure has already started to grow quietly inside the design.
For custom projects, I do not judge waterproof risk only by the IP target. I judge it by the weakest sealing area, because water does not care about the strongest part of the enclosure.
Incorrect assumptions about IP ratings
Many buyers know the words IP65, IP66, and IP67. But not every buyer understands the real difference between them.
That is normal. Most people do not read IP standards for fun. I also do not read them for pleasure with coffee on Sunday morning. That would be a very sad hobby.
But in business, these numbers matter.
A buyer may say, “We need waterproof.” Then I ask, “Do you mean rain protection, washdown protection, or short-term immersion protection?”
The answer changes the design.
| IP Rating | Common Meaning | Typical Risk If Misused |
|---|---|---|
| IP65 | Dust-tight and protected against water jets | May not survive stronger washdown or immersion |
| IP66 | Dust-tight and protected against powerful water jets | Still not designed for being submerged |
| IP67 | Dust-tight and protected against temporary immersion | May not be ideal for high-pressure water spray |
| IP68 | Longer immersion under defined conditions | Conditions must be clearly agreed |
The problem is not that buyers ask for the wrong rating. The problem is that some people think a higher number always means a better solution.
That is not always true.
For example, an enclosure used in a food processing factory may face high-pressure washdown from different angles. IP67 sounds stronger than IP66 because the number is higher. But if the product faces powerful water jets instead of immersion, IP66 may be more relevant.
A different example: an outdoor communication box may not be submerged, but it may face sunlight, rain, dust, thermal cycling, and condensation. If the design focuses only on one water test and ignores long-term outdoor aging, the project still has risk.
Confusing water resistance with full waterproof protection
“Waterproof” is one of those words that causes trouble because it sounds too simple.
A watch can be water-resistant.
A phone can resist splashes.
An industrial enclosure can pass a certain IP test.
But none of these words mean the product can survive every water condition forever.
In real projects, I prefer to replace “waterproof” with a more useful question:
What kind of water exposure will the enclosure face?
That one question changes the conversation.
| Water Exposure Type | What I Need To Check |
|---|---|
| Light rain | Cover seal, mounting direction, drainage |
| Outdoor storm | Wind-driven water, gasket pressure, cable glands |
| Factory washdown | Spray pressure, chemical contact, screw sealing |
| Temporary flooding | Immersion depth, time, pressure difference |
| Marine environment | Salt spray, corrosion, material aging |
| Condensation | Temperature change, venting, internal humidity |
This is where a buyer’s real use case becomes more important than the rating number.
If a buyer says, “The enclosure will be used outside,” I still do not know enough.
Outside where?
On a wall?
Under a roof?
Near the sea?
On a moving machine?
In direct sunlight?
With cables entering from the top or bottom?
A waterproof enclosure is not only fighting water. It is fighting gravity, pressure, vibration, sunlight, dust, and human installation behavior.
Misunderstanding IP65 vs IP66 vs IP67 applications
I have met buyers who think IP67 is always the best choice.
I understand why. It feels safer.
But sometimes, a buyer pays for the wrong protection. Other times, the buyer asks for IP67 while the design has many cable ports, display windows, switches, and connectors. Then the enclosure becomes expensive, difficult to seal, and still not reliable after field installation.
Here is a simple way I often explain it:
| Buyer Requirement | Better Question To Ask |
|---|---|
| “I need IP65.” | What type of water spray will it face? |
| “I need IP67.” | Will it really be submerged? For how long? |
| “I need outdoor use.” | Will it face sun, rain, wind, salt, or snow? |
| “I need washdown.” | What pressure and cleaning chemical will be used? |
| “I need waterproof cable entry.” | What cable size, gland type, and installation method? |
The rating should follow the real application.
It should not lead the project blindly.
Assuming thicker material automatically improves waterproofing
This mistake is very common.
A buyer may say, “Can we make the wall thicker? Then it will be more waterproof.”
Sometimes thicker material helps strength. It can reduce deformation. It can improve screw holding. It can make the enclosure feel more solid.
But thickness alone does not create a good seal.
A thick enclosure with a poor gasket design can still leak.
A thinner enclosure with a well-designed sealing path can perform better.
The key is not just thickness. The key is how the sealing force is created and maintained.
| Design Factor | Why It Matters |
|---|---|
| Wall thickness | Affects strength and deformation |
| Cover flatness | Affects gasket contact |
| Screw spacing | Affects compression balance |
| Gasket hardness | Affects sealing pressure |
| Sealing groove design | Controls gasket position |
| Cutout placement | Can weaken sealing areas |
If the enclosure cover bends slightly between screws, water may find a tiny path. If a corner lifts because the screw is too far away, the gasket may not be compressed evenly. If the gasket is too hard for the structure, it may not fill small gaps.
Water only needs a small chance.
It does not need a big invitation.
Ignoring the actual installation environment
One enclosure can behave very differently in different environments.
This is where many early discussions are too shallow.
A buyer may send a drawing and ask for waterproof pricing. But the drawing does not tell me whether the enclosure will be installed indoors, outdoors, on a moving machine, near chemicals, or inside a hot cabinet.
Those details are not small.
They decide the real risk.
| Environment | Hidden Waterproof Risk |
|---|---|
| Indoor factory | Oil mist, dust, vibration, cleaning water |
| Outdoor wall | Rain, UV, temperature change, insects |
| Marine area | Salt corrosion, humidity, gasket aging |
| Vehicle or machine | Shock, vibration, cable movement |
| Food factory | Washdown, chemical cleaner, frequent maintenance |
| Solar or energy system | Heat, rain, condensation, long outdoor life |
I once saw an enclosure design that looked fine for normal outdoor rain. But the buyer later mentioned that the product would be cleaned with water spray during maintenance. That small sentence changed the whole risk picture.
The original design had top-side cable entry. Rain would not be a big problem if installed correctly. But sprayed water from maintenance could hit the cable glands directly.
Same enclosure.
Different water direction.
Different risk.
Indoor factory moisture vs outdoor rain exposure
Indoor does not always mean safe.
Some indoor factories are dry and clean. Some are humid, oily, dusty, and full of cleaning routines. A sealed enclosure inside a factory may face more aggressive conditions than an outdoor enclosure under a roof.
Outdoor rain also has different levels.
Light vertical rain is one thing. Wind-driven rain is another. Water running down a wall behind the enclosure is another. Water collecting around a top-mounted cable gland is another.
I like to ask buyers to describe the installation like a short story, not just a technical line.
For example:
- Where will the enclosure be mounted?
- Which side faces upward?
- Where do the cables enter?
- Will workers open the cover often?
- Will the enclosure be cleaned?
- Will water hit it directly?
- Will the product face sunlight?
- Will it be near chemicals or oil?
These questions sound simple. But they often reveal the real waterproof problem before production starts.
Chemical washdown environments and oil mist risks
Water is not always just water.
That is an easy point to forget.
In some factories, the enclosure may face cleaning liquid, coolant, oil mist, or chemical spray. These substances can attack gasket material over time. A gasket that works well with clean water may age faster in an oily environment.
Different gasket materials behave differently.
| Material | Common Strength | Possible Weakness |
|---|---|---|
| Silicone | Good flexibility, good temperature resistance | May not be best for some oils or mechanical wear |
| EPDM | Good weather and water resistance | Not ideal for many oils |
| NBR | Better oil resistance | Weaker outdoor UV aging compared with some materials |
| Foam gasket | Easy to compress, lower cost | May absorb moisture or lose shape faster |
This is not a place where I like guessing.
If the customer’s environment includes chemicals, I prefer to confirm the liquid type. Even a rough description is better than nothing. Cleaning alcohol, salt spray, cutting fluid, and detergent are not the same enemy.
Temperature cycling and condensation issues
Temperature can quietly break waterproof logic.
An enclosure may pass a water spray test at room temperature. Then it gets installed outdoors. Daytime heat makes the air inside expand. Nighttime cooling makes pressure drop. Moist air gets pulled inside through tiny gaps. After enough cycles, condensation appears.
The buyer may say, “But the enclosure is sealed.”
Yes.
And that is part of the problem.
A sealed enclosure can trap humidity inside. If there is heat from electronics and cold air outside, condensation may form on the inner wall. The customer sees water inside and thinks the enclosure leaked.
Sometimes it did leak.
Sometimes it breathed moisture.
Sometimes the cable gland allowed tiny air exchange.
Sometimes the enclosure was opened during humid weather and then closed again.
Waterproof design has to think about water outside and moisture inside.
Poor enclosure structure planning
A weak structure can destroy a good gasket.
This is one of the painful lessons in custom enclosure work. A buyer may choose a good gasket. The supplier may use good material. The cover may look strong. But if the structure does not press the gasket evenly, the seal is still weak.
The most common structural issues include:
- Long cover span without enough screws
- Thin cover plate that bends under pressure
- Weak corners
- Gasket path too close to an edge
- Cutouts too close to the sealing area
- Poor support around cable holes
- Uneven surface after bending or welding
A waterproof enclosure is like a door with weather stripping. If the door frame is twisted, the rubber seal cannot save it. You can buy expensive rubber. You can close the door harder. But the gap is still there.
Weak joint positions and seam design
Seams are always suspicious.
I do not mean every seam is bad. Many enclosures need seams. Covers must open. Panels must connect. Sheet metal parts may need bending or welding. Extruded aluminum profiles need end plates.
But seams are where water likes to investigate.
The seam design should answer several questions:
| Seam Question | Why It Matters |
|---|---|
| Is the gasket continuous? | Breaks create leak paths |
| Is the seam protected from direct water? | Exposed seams face higher risk |
| Is there enough screw pressure? | Uneven force creates gaps |
| Is the surface flat? | Poor contact weakens sealing |
| Can the user install it wrong? | Field mistakes are common |
A nice-looking seam is not enough.
A waterproof seam needs a clear sealing path and stable pressure.
Sharp corners and deformation risks
Sharp corners can be attractive in industrial design. They look clean and modern.
But in waterproof enclosure design, sharp corners may create trouble.
Gaskets do not always like sharp turns. Foam or rubber may stretch, bunch, or lose contact around corners. Sheet metal corners may deform. Plastic corners may shrink differently after molding. Aluminum parts may look sharp, but the gasket needs enough space to sit properly.
Rounded corners often help sealing because they make the gasket path smoother.
This does not mean every enclosure must look round and soft. Industrial products still need a practical appearance. But if the buyer wants a sharp design and waterproof performance at the same time, we need to check the corner structure carefully.
Design is always a trade-off.
A product can look beautiful and fail quietly.
Drainage and pressure balance being overlooked
Many buyers think waterproof design means “block all water.”
That is only one part.
Sometimes good design also means controlling where water goes.
If water collects on a top surface, around screws, or near cable glands, the risk becomes higher. If the enclosure has a shape that traps water after rain, the sealing area faces longer exposure. If pressure changes inside the enclosure, moisture may be pulled through weak points.
A good enclosure should not invite water to stay.
Small design choices can help:
- Avoid top-facing cable entries when possible
- Use drip edges or overhangs in outdoor designs
- Place cable glands downward when installation allows
- Avoid flat pockets that collect water
- Consider breathable vents for pressure balance
- Keep sealing areas away from standing water
This is the kind of detail that does not look exciting on a drawing.
But in real life, it matters.
And once the design is fixed, changing it later becomes expensive.
A small line on a drawing can become a large headache after production. That is why I always slow down when I see cable holes, because water often enters through the place everyone treats as “just a small opening.”
Why Are Cable Entry Points the Biggest Waterproof Failure Area?
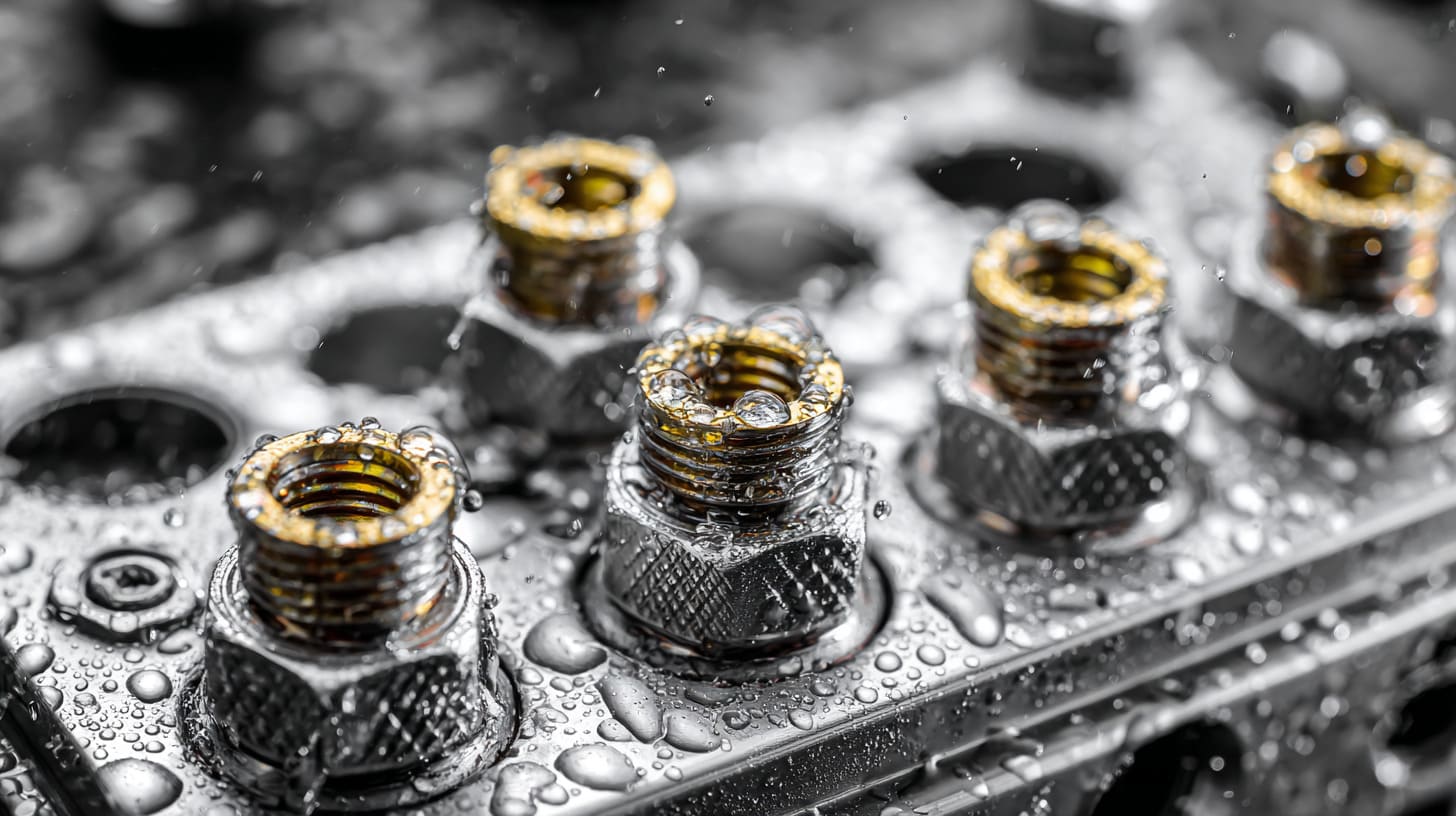
Cable entry points are the most dangerous part of many waterproof enclosures.
Not because cable glands are bad.
Good cable glands can work very well.
The problem is that cable entry points combine several risks in one small area:
- A hole is added to the enclosure wall
- A separate sealing part is installed
- The cable size may vary
- The installer may make mistakes
- The cable may move during use
- The gland may face water directly
- The sealing pressure depends on correct tightening
That is a lot of risk for one small hole.
I sometimes joke with customers that the enclosure body is innocent. The troublemaker is usually the cable entry. It smiles quietly on the drawing, then causes all the drama later.
When I review a waterproof enclosure, I pay special attention to the cable side because it is the place where design, parts, and human installation all collide.
Incorrect cable gland selection
A cable gland is not just a small accessory.
It is a sealing component.
If the gland does not match the cable diameter, thread size, material, and environment, the waterproof level can drop quickly.
The common mistake is selecting a gland only by hole size.
That is not enough.
| Cable Gland Factor | What Can Go Wrong |
|---|---|
| Cable diameter range | Cable may be too loose or too tight |
| Thread type | Poor fit causes sealing failure |
| Material | Plastic may crack or age; metal may corrode if wrong material |
| Seal ring quality | Low-quality rubber may deform or age |
| IP rating | Gland rating may not match enclosure target |
| Installation direction | Water may sit around the gland |
A buyer may ask, “Can we use a cheaper gland?”
Sometimes yes.
But not always.
If the enclosure is used indoors with light dust and occasional moisture, a standard nylon gland may be enough. If the enclosure is used outdoors, near machines, or in washdown areas, the gland needs more attention.
The cheapest part can become the most expensive failure.
Using low-quality or mismatched cable glands
Low-quality glands are dangerous because they often look fine at first.
They have threads. They have nuts. They have rubber seals. They can be tightened.
But the material may be weak. The rubber may harden. The thread may not hold well. The sealing ring may not compress evenly.
For one sample, it may pass.
For 1,000 pieces, the story may change.
Here is how I usually think about it:
| Project Type | Cable Gland Choice |
|---|---|
| Indoor electronics box | Standard nylon gland may be acceptable |
| Outdoor control box | UV-resistant gland should be considered |
| Industrial machine enclosure | Stronger gland and better locking are needed |
| Marine or corrosive area | Stainless steel or corrosion-resistant material may be needed |
| High-vibration equipment | Thread locking and cable strain relief matter more |
The gland must fit the real job.
It should not be selected only because it is available in stock.
Wrong thread sizing and sealing pressure
Thread mismatch is a quiet killer.
If the gland thread does not fit the enclosure hole properly, the sealing ring may not sit flat. If the panel thickness is too thin, the gland may not lock firmly. If the hole is too large, the gland may shift slightly. If the thread engagement is too short, vibration can loosen it.
This is why hole tolerance matters.
It is also why drawings must clearly define cable gland holes, not just show a circle.
A proper cable entry design should define:
- Hole diameter
- Thread type
- Panel thickness
- Gland model
- Gasket or O-ring position
- Nut side clearance
- Installation direction
- Cable diameter range
It sounds like a lot for a small part.
But that small part is where water will test your patience.
Plastic glands vs metal glands in industrial use
Plastic glands and metal glands both have their place.
I do not believe metal is always better. I also do not believe plastic is always cheaper and weaker. The right choice depends on the use environment.
| Gland Type | Good For | Be Careful With |
|---|---|---|
| Nylon plastic gland | General electronics, light industrial use | UV aging, impact, high heat |
| Nickel-plated brass gland | Stronger industrial use | Corrosion in some environments |
| Stainless steel gland | Marine, chemical, harsh environments | Higher cost |
| EMC cable gland | Shielding needs | More complex installation |
| Breathable cable gland/vent | Pressure balance | Must match waterproof target |
In some cost-sensitive OEM projects, buyers want a strong-looking metal gland. But if the enclosure is plastic, the metal gland may stress the wall if installed badly. In other cases, a nylon gland on an outdoor aluminum box may become the weak point after long UV exposure.
The material match matters.
The installation behavior matters too.
Problems caused by custom cutouts
Custom openings are one of the main reasons waterproof design gets complicated.
A standard enclosure is easier to seal because the structure is tested and stable. But OEM projects often need many custom cutouts:
- USB ports
- Aviation connectors
- Switches
- Display windows
- Sensor holes
- Cable glands
- Heat vents
- Mounting holes
- Antenna holes
Every opening is a possible leak path.
Every opening also affects strength.
A large cutout can make a panel weaker. A weak panel can bend. A bent panel can reduce gasket pressure. Then water finds a path.
This is why I always get nervous when a buyer adds new holes late in the project. The drawing may still look simple, but the sealing logic changes.
CNC cut tolerance issues
CNC machining is precise, but it is not magic.
Every machining process has tolerance. Tool wear, fixture position, material stress, and surface finish can affect the final result. For many normal holes, small variation is not a big problem. For waterproof cable entries, the same variation can matter more.
If a gland needs a tight fit, a slightly large hole may reduce sealing pressure. If the hole edge has burrs, the O-ring may not sit flat. If the hole is too close to a bend or weld, the surface may not be even.
For waterproof projects, I like to check:
| Cutout Detail | Risk |
|---|---|
| Hole diameter | Too large or too small affects gland fit |
| Edge burr | Can damage sealing ring |
| Surface flatness | Poor contact weakens seal |
| Distance from edge | Too close may deform panel |
| Distance from gasket path | May weaken main enclosure seal |
| Panel thickness | Affects thread locking |
A small burr can look harmless.
Water does not agree.
Uneven panel surfaces affecting gasket compression
A cable gland needs a flat surface to seal properly.
That sounds obvious, but many custom enclosures have bends, welds, brushing, powder coating, or anodizing. These processes can slightly affect the sealing surface.
If a gland sits on an uneven surface, one side may compress more than the other. The O-ring may look compressed, but not evenly. Under water spray or pressure change, the weak side may leak.
This is more common around:
- Bent sheet metal corners
- Welded areas
- Textured powder coating
- Curved surfaces
- Thin panels with large openings
- Areas near stiffening ribs
When customers send designs with cable glands on curved or angled surfaces, I ask more questions. Sometimes the answer is to move the gland. Sometimes we add a flat boss. Sometimes we change the sealing part.
The best fix depends on the enclosure structure.
Large connector openings weakening waterproof performance
Large connectors are harder than cable glands.
A cable gland seals around a cable. A connector cutout may need a flange, screws, an O-ring, and a flat panel. The connector supplier may claim a waterproof rating, but the final assembly still depends on the enclosure panel and installation method.
A large rectangular opening can weaken the wall.
It can also place screw holes too close to edges.
It can create uneven pressure around the connector gasket.
| Opening Type | Typical Waterproof Concern |
|---|---|
| Round cable gland hole | Gland fit and cable diameter |
| USB waterproof connector | Connector seal and mounting screws |
| Display window | Adhesive or gasket sealing |
| Large rectangular port | Panel deformation and flange pressure |
| Antenna hole | Small O-ring position and torque |
| Switch hole | Seal ring quality and user operation |
A connector may be rated IP67 by itself.
But the full enclosure assembly may not be IP67.
That difference matters.
Human installation mistakes
Even a good design can fail if installation is poor.
This is the part many people dislike talking about because it feels messy. But real products are installed by real humans. People are tired. People rush. People use the wrong tool. People forget sealing rings. People tighten one side too much. People open the enclosure in the field and close it again badly.
Waterproof design must be easy to assemble correctly.
If it depends on perfect human behavior every time, it is risky.
The best waterproof design is not only technically correct. It is also hard to install wrong.
Over-tightening or under-tightening glands
Both can cause failure.
Under-tightening is easy to understand. The seal does not compress enough. Water enters.
Over-tightening is more sneaky. It can damage the rubber ring. It can crack plastic glands. It can deform thin panels. It can strip threads. It can make the first test pass, then fail later because the seal has been damaged.
This is why torque guidance can matter in serious projects.
| Installation Error | Possible Result |
|---|---|
| Too loose | Poor seal, gland movement |
| Too tight | Damaged seal, cracked gland, panel deformation |
| Wrong cable size | Seal cannot grip cable properly |
| Missing O-ring | Immediate leak risk |
| Dirty surface | Seal does not sit flat |
| Cable pulled sideways | Long-term seal stress |
For simple products, buyers may not want detailed assembly instructions.
But for waterproof products with field installation, clear instructions can prevent many failures.
Damaged sealing rings during assembly
A sealing ring is small and easy to ignore.
But if it is twisted, cut, dirty, stretched, or missing, the enclosure may fail.
This happens more often than people think.
During assembly, workers may remove parts, adjust cables, or tighten nuts. A sharp hole edge may scratch the ring. A dirty surface may press dust into the seal. A ring may fall out and nobody notices.
For mass production, we try to reduce this risk by using:
- Clear assembly steps
- Visual inspection
- Proper edge deburring
- Pre-installed gasket parts
- Better packaging for small seal rings
- Worker training for waterproof models
This is not glamorous work.
But waterproof reliability often depends on boring discipline.
Incorrect field installation by end users
A buyer may receive perfect enclosures from the factory.
Then the end user drills an extra hole.
Or installs the enclosure upside down.
Or routes cables from the top.
Or opens the cover many times and pinches the gasket.
Or replaces a cable gland with a local part.
Then the enclosure leaks.
Who is responsible?
That can become a painful discussion.
For OEM buyers, this is why product documentation matters. If the enclosure will be installed by customers, contractors, or field workers, the design should guide correct installation.
Simple marks can help:
- “Cable entry should face downward”
- “Do not drill additional holes”
- “Check gasket before closing cover”
- “Tighten screws evenly”
- “Use suitable cable diameter”
- “Replace damaged sealing parts”
A waterproof enclosure does not end at the factory door.
It continues into the hands of the installer.
And if the installer has to guess, the enclosure is already in danger.
Once cable entry is controlled, many buyers feel relaxed. But I do not relax yet. The next place I check is softer, quieter, and easier to underestimate: the gasket.
How Do Gasket Problems Destroy Waterproof Performance?
A gasket looks like a simple strip of rubber or foam.
But in waterproof enclosure design, it is the quiet worker doing most of the heavy lifting.
The gasket is not decorative. It is not just “one accessory.” It is the flexible bridge between two hard surfaces. It must fill tiny gaps, handle compression, recover after opening, resist aging, and survive the real environment.
When a waterproof enclosure leaks, many people blame the gasket first.
Sometimes they are right.
But I like to ask a deeper question: did the gasket fail, or did the design ask the gasket to do an impossible job?
That question changes the blame game into engineering thinking.
A gasket cannot fix a warped cover. It cannot save poor screw spacing. It cannot survive the wrong chemical forever. It cannot seal well if it is cut badly or glued in the wrong place.
When I choose or review a gasket, I think less about the gasket alone and more about the whole sealing system around it.
Choosing the wrong gasket material
Different gasket materials feel similar to many buyers.
Soft black strip. Soft gray strip. Soft silicone strip. Foam tape. Rubber cord.
But the differences matter.
A gasket must match the application, the enclosure material, the environment, and the expected life.
| Gasket Material | Common Strength | Common Risk |
|---|---|---|
| Silicone | Flexible, good temperature resistance, good recovery | Higher cost, not always best for oil |
| EPDM | Good water and outdoor weather resistance | Poor resistance to some oils |
| NBR | Better oil resistance | Less suitable for long UV exposure |
| PU foam | Good compression, easy to apply | May age or absorb moisture depending on type |
| Neoprene | Balanced performance | Must check chemical and outdoor needs |
A buyer may say, “Just use rubber.”
But “rubber” is not enough information.
That is like saying, “Just use metal.” Aluminum, steel, stainless steel, and zinc alloy are all metal, but they behave differently.
Silicone vs EPDM vs foam gasket differences
Silicone is often a good choice when flexibility and temperature resistance matter. It can handle heat and cold better than many other materials. It also keeps its shape well in many applications.
EPDM is often strong for outdoor weather and water resistance. It is common in sealing applications. But it may not be the best choice when oil exposure is heavy.
Foam gasket can be useful because it compresses easily. It can help fill small gaps. But not all foam gaskets are equal. Some are better for dust and splash. Some can lose compression over time. Some may absorb moisture if the structure is poor.
Here is a simple comparison I use in early project talks:
| Question | Material Thinking |
|---|---|
| Will it face outdoor rain and sunlight? | EPDM or suitable silicone may be considered |
| Will it face heat from electronics? | Silicone may be safer |
| Will it face oil or coolant? | NBR or special material may be needed |
| Is the sealing surface slightly uneven? | Foam may help, but long-term compression must be checked |
| Will the cover be opened often? | Material recovery becomes very important |
The cheapest gasket may pass a short test.
The right gasket survives the job.
There is a big difference.
Chemical compatibility problems
Chemical compatibility is not exciting until it becomes expensive.
If the enclosure is used in a factory, the gasket may contact oil mist, coolant, cleaning liquid, alcohol, detergent, or other chemicals. These can change the gasket over time.
The gasket may swell.
It may harden.
It may crack.
It may lose recovery.
It may become sticky.
Then the enclosure starts leaking, and everyone wonders why the first batch was fine.
The answer may be simple: the lab test used clean water, but the real site used chemicals.
That is why I ask about the environment early. If the buyer does not know the exact chemical, I still ask for a general description. Is it oil? Is it salt? Is it cleaning foam? Is it alcohol? Is it coolant?
Even a rough answer helps avoid a blind choice.
Aging and UV exposure risks
Outdoor projects need special care.
Sunlight, heat, cold, and rain slowly attack materials. A gasket that is soft today may not stay soft after two years outside.
Plastic enclosures also age. Coatings age. Adhesives age. Cable glands age.
Waterproof performance is not frozen in time.
This is why a product that passes IP testing when new may still fail later in the field.
For outdoor enclosures, I like to think about:
- UV resistance
- Temperature range
- Compression set
- Gasket recovery
- Material hardness
- Adhesive aging
- Cover opening frequency
- Maintenance behavior
A gasket is like a small promise. The question is not only whether it can seal today. The question is whether it can keep the promise after real life starts pushing it around.
Poor gasket compression design
A gasket needs the right compression.
Too little compression causes gaps.
Too much compression damages the gasket.
Uneven compression creates weak spots.
This sounds simple, but it is one of the hardest parts of waterproof enclosure design.
The gasket must be compressed enough to seal tiny gaps. But the structure must not crush it so much that it loses recovery. The screws must be placed well. The cover must be stiff enough. The groove must guide the gasket properly.
In real projects, I often care more about compression balance than the gasket material name, because even a good gasket performs badly when the pressure is uneven.
Uneven screw pressure distribution
Screws are not just for closing the cover.
They create sealing pressure.
If the screw spacing is too wide, the cover may lift slightly between screws. If the corner does not have enough pressure, water may enter there. If one side has many screws and the other side has fewer, the gasket may compress unevenly.
| Screw Design Issue | Waterproof Risk |
|---|---|
| Screws too far apart | Cover flex and weak gasket pressure |
| Screws too close to edge | Cracking or deformation risk |
| Uneven screw layout | Uneven compression |
| Weak screw bosses | Poor long-term tightening |
| Wrong screw torque | Damaged gasket or loose cover |
For small enclosures, this may be easy to manage.
For large enclosures, it becomes more serious. A larger cover has more chance to bend. A thin sheet metal cover can flex. A plastic cover can deform over time. A large aluminum cover may need better support or more screws.
Thin walls causing enclosure flex
Thin walls help reduce cost and weight.
But thin walls can make sealing harder.
If the base or cover flexes when screws are tightened, the gasket pressure may not be stable. If the enclosure is mounted on an uneven wall, the base may twist slightly. If cables pull on one side, the panel may bend.
This is common in cost-sensitive projects.
The buyer wants a lower price. The supplier reduces material thickness. The enclosure still looks fine. But the sealing system becomes weaker.
This is why I do not only ask, “What is the thickness?”
I also ask, “Where is the sealing force going?”
A 1.5 mm sheet metal cover may be fine for one design. It may be risky for another. A 3 mm aluminum wall may be strong, but if the gasket groove is poor, it still may leak.
Thickness is only one piece of the story.
Over-compression damaging long-term sealing
Some people think tightening harder makes waterproofing better.
That is a dangerous idea.
If the gasket is over-compressed, it can lose its ability to bounce back. This is called compression set, but in simple words, the gasket gets tired. It becomes flatter. It stops pushing back. After some time, the seal becomes weaker.
This can happen faster when the enclosure faces heat.
It can also happen if the cover is opened and closed many times.
The right design should control compression. It should not depend on workers guessing how hard to tighten the screws.
Good designs often use:
- Gasket grooves
- Compression stops
- Proper screw torque
- Suitable gasket hardness
- Stable wall thickness
- Even screw layout
A gasket should be pressed.
It should not be punished.
Manufacturing inconsistencies
A sample gasket can be installed carefully.
Mass production is different.
In sampling, one skilled worker may assemble the enclosure slowly. Everyone pays attention. The gasket is placed neatly. The screws are tightened carefully. The sample is cleaned before testing.
In mass production, workers must build many pieces. Speed increases. Small differences appear.
That is normal in manufacturing.
The question is whether the design can tolerate those small differences.
Glue positioning problems
Some gaskets are glued into place.
This seems simple, but it can create problems:
- Glue line may be uneven
- Gasket may shift during installation
- Corners may lift
- Gasket ends may not meet well
- Adhesive may age
- Surface may not be cleaned properly before bonding
If the gasket is not seated correctly, the cover may pinch it. Or the gasket may move away from the sealing path. Or the joint between two ends may create a small gap.
For low-volume custom projects, manual gasket installation may work well with inspection.
For larger orders, the process needs control.
Manual installation errors
Manual assembly is flexible, but it depends on people.
That is both good and bad.
A skilled worker can catch problems quickly. But a tired worker can also make mistakes. A new worker may not understand why a gasket corner matters. A rushed production line may miss a small issue.
For waterproof models, inspection should focus on sealing details:
| Inspection Point | What To Check |
|---|---|
| Gasket position | No shift, no twist, no gap |
| Gasket surface | No cuts, dust, or damage |
| Gasket joint | Ends meet correctly |
| Cover surface | Clean and flat |
| Screw tightening | Even and not excessive |
| Cable glands | Correct model and correct seal |
This is simple work.
But simple work saves projects.
Tolerance stack-up during mass production
Tolerance stack-up is one of those quiet factory problems that buyers rarely see.
Each part may be within tolerance. The cover is acceptable. The base is acceptable. The gasket is acceptable. The screw bosses are acceptable. The coating thickness is acceptable.
But when all small variations combine, the final sealing pressure changes.
That is tolerance stack-up.
It is why waterproof consistency becomes harder in volume production.
A sample can pass. A few pieces can pass. But if the design has no margin, some units in mass production may become risky.
This is why I like to test and inspect more than one unit before production approval. One perfect sample is nice. Several stable samples are better.
The gasket teaches a hard lesson: soft parts often reveal hard mistakes. And this lesson becomes even sharper when we move from prototype to mass production.
Why Do Prototype Samples Often Perform Better Than Mass Production?
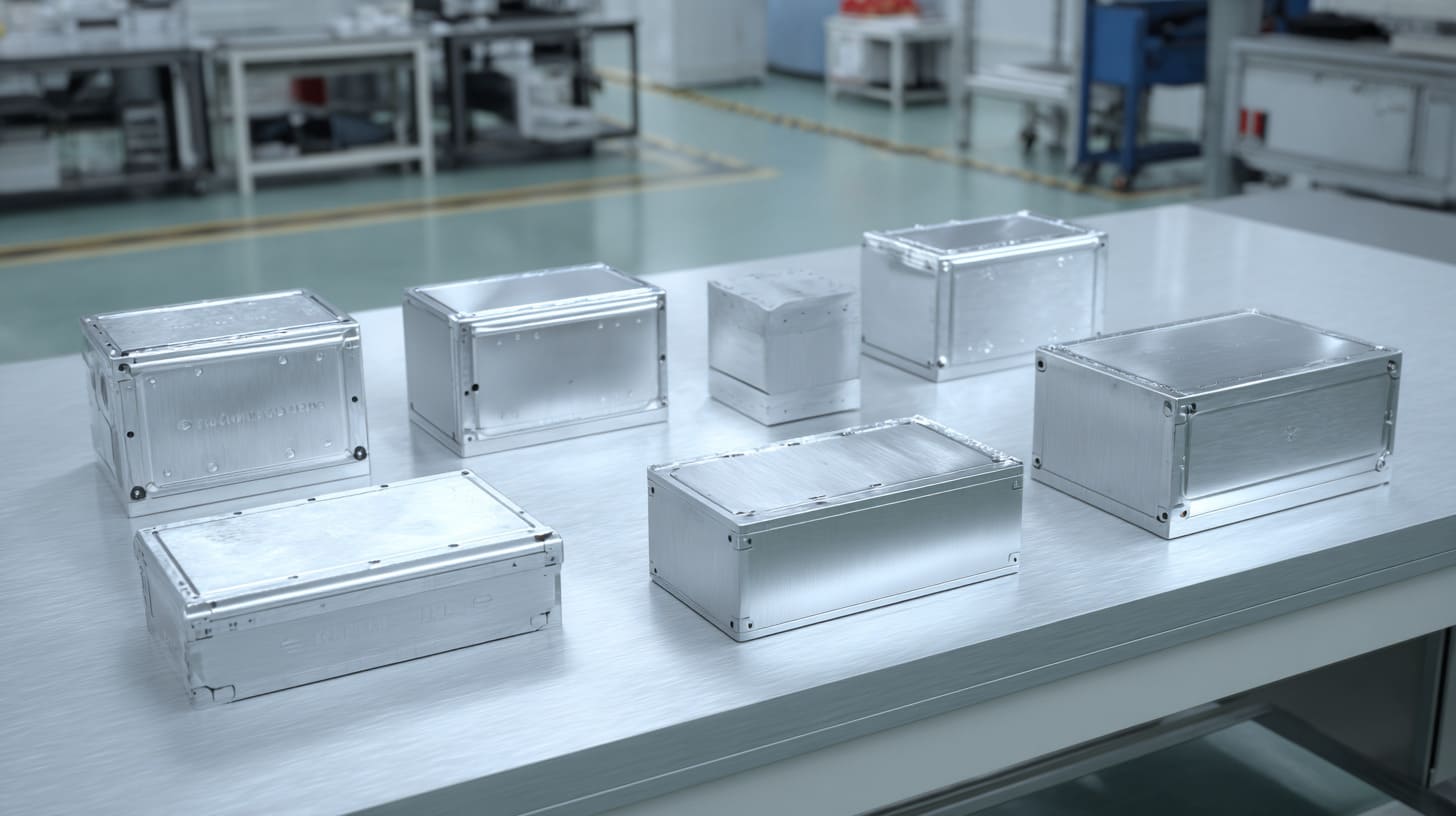
Prototype samples often look better than mass production units.
I do not say this to scare buyers.
I say it because it is real.
A prototype is usually made with more attention, more time, and more manual control. The factory knows the buyer is judging the project. The engineer checks the details. The worker handles the sample carefully. The assembly may be done by the most experienced person.
Mass production is different.
Now the process must repeat. Again and again. Maybe 200 pieces. Maybe 1,000 pieces. Maybe more. Small variations appear. The real question is not whether the best unit can pass. The real question is whether the normal units can pass.
That is where many waterproof projects show their true strength or weakness.
I do not trust one beautiful sample too much; I trust a design only after I see that ordinary production pieces can still keep the sealing logic stable.
Prototype manufacturing is usually more precise
Prototype production often uses CNC machining, hand fitting, and careful checking.
If the project is a custom aluminum enclosure, the sample may be machined slowly. The surface may be checked by the engineer. The gasket may be installed with extra care. The cable glands may be tightened by someone who knows the test target.
This creates a very clean result.
But it can also hide future production risks.
A prototype may pass because people saved it with attention.
Mass production must pass because the design is strong enough.
That difference is important.
CNC machining vs volume production methods
CNC machining is flexible and precise. It is great for prototypes and low-volume custom parts. But mass production may use different processes, depending on the product:
- CNC machining
- Sheet metal bending
- Stamping
- Die casting
- Extrusion
- Injection molding
- Welding
- Surface finishing
- Assembly line production
Each process creates different risks.
| Process | Possible Waterproof Concern |
|---|---|
| CNC machining | Cost and time in volume, tool marks, burrs |
| Sheet metal bending | Flatness, corner deformation, seam control |
| Die casting | Shrinkage, porosity, dimensional variation |
| Extrusion | End plate sealing, profile tolerance |
| Injection molding | Shrinkage, warpage, gasket groove control |
| Welding | Heat deformation, surface grinding quality |
| Powder coating | Coating thickness affects fit and sealing |
If the prototype process and mass production process are different, buyers must pay attention.
A CNC sample may be very accurate. But if the final product is die cast or stamped, the sealing design must be reviewed again for that process.
Manual inspection advantages during sampling
During sampling, inspection is personal.
The engineer may hold the part and look at every edge. The worker may clean the gasket area carefully. The salesperson may send photos. Everyone knows this sample matters.
In mass production, inspection must be systematic.
If inspection depends only on “people being careful,” risk increases.
A good production plan should define:
- Critical dimensions
- Gasket inspection points
- Cable gland installation checks
- Screw torque or tightening method
- Surface flatness requirements
- Waterproof test sampling ratio
- Packaging protection for sealing areas
Sampling is a conversation.
Mass production is a system.
If the system is weak, the sample cannot protect the project.
Cleaner assembly conditions during prototype stage
Prototype assembly is usually cleaner.
The table is cleaner. The worker has more time. The gasket area is wiped. The screws are placed carefully. The cable glands are checked.
Mass production can be messier.
Dust, small metal chips, coating powder, oil, fingerprints, and packaging material can affect sealing. One small particle on the gasket surface can create a leak path. One metal burr can cut a gasket. One badly stored gasket can deform.
Waterproof assembly needs clean habits.
Not hospital-level clean. But clean enough that the sealing surfaces are protected.
Mass production is where small things become big things.
One small variation in a sample is just one small variation.
One small variation across 1,000 pieces becomes a pattern.
This is why production planning matters so much.
A buyer may think the design is approved after the sample passes. But I see sample approval as only one checkpoint. It proves the concept. It does not automatically prove mass production stability.
Material batch differences
Materials can vary slightly from batch to batch.
Aluminum sheet may have small thickness variation. Plastic material may shrink differently. Rubber gasket hardness may vary. Powder coating thickness may change. Screws from another batch may behave differently.
Most of these changes are small.
But waterproof design is sensitive to small changes.
| Material Variation | Possible Impact |
|---|---|
| Aluminum thickness variation | Changes stiffness and fit |
| Plastic shrinkage variation | Affects gasket groove and cover flatness |
| Rubber hardness variation | Changes compression behavior |
| Coating thickness variation | Affects screw fit and sealing surfaces |
| Screw batch difference | Affects tightening and torque control |
This is why good suppliers keep important materials controlled.
It is also why buyers should not change material or surface finish casually after testing.
A color change may look simple.
A coating thickness change may affect fit.
A gasket supplier change may affect compression.
Small changes are not always small.
Worker assembly inconsistencies
Workers are human.
Some tighten screws more. Some tighten less. Some install gaskets faster. Some check corners more carefully. Some may not understand why one small seal ring matters.
This is normal.
Good manufacturing does not pretend workers are robots. Good manufacturing creates steps that help workers make fewer mistakes.
For waterproof enclosures, this can include:
- Assembly fixtures
- Torque tools
- Visual samples
- Clear work instructions
- Gasket pre-checks
- Cable gland model control
- Final inspection photos
- Random waterproof testing
A design that needs perfect assembly every time is not production-friendly.
It is a beautiful troublemaker.
Faster production speed reducing detail control
Speed is a hidden enemy of waterproof quality.
When production is slow, workers have time to feel problems. When production is fast, small details can slip through. This matters when the project has many sealing parts.
For example, a worker may assemble a standard dry-use enclosure quickly with no issue. But a waterproof enclosure needs more care:
- Check gasket position
- Remove burrs
- Keep sealing surface clean
- Tighten screws evenly
- Confirm cable gland seal
- Avoid damaging O-rings
- Protect gasket during packaging
If the production line treats a waterproof enclosure like a normal box, quality risk rises.
Waterproof products need a different mindset.
Waterproof consistency becomes harder at scale
The hardest part is not making one waterproof enclosure.
The hardest part is making many waterproof enclosures with the same sealing result.
This is why I focus on consistency.
A buyer may ask, “Can your enclosure pass IP65?”
A better question is, “Can the production batch keep stable IP65 performance under normal assembly?”
That is a stronger question.
Small tolerance shifts affecting gasket sealing
Imagine the gasket compression target is already narrow.
Now the cover is slightly flatter on one unit and slightly bent on another. The gasket is slightly harder in one batch. The powder coating is slightly thicker. The screw is tightened slightly less.
Each change is small.
Together, they may reduce sealing pressure.
This is why waterproof designs need margin. They should not work only when everything is perfect.
A good design should tolerate normal production variation.
Surface finish variations impacting contact areas
Surface finish can affect waterproof performance more than buyers expect.
Powder coating, anodizing, brushing, polishing, and painting can all change surface texture and thickness.
If the gasket seals against a coated surface, coating quality matters. If the coating is rough, uneven, or too thick near corners, the gasket contact may change. If a surface is brushed deeply, tiny grooves may create paths. If coating builds up near screw holes, cover fit may change.
For aluminum enclosures, anodizing is usually thinner than powder coating. Powder coating can be thicker and more protective, but it may also affect tight-fitting structures.
There is no single best finish for every project.
The finish must match the sealing design.
Real factory conditions vs ideal sample conditions
The sample is like a clean photo.
Mass production is like a kitchen during dinner rush.
Both can produce good results, but the system must be ready for the real pace.
This is why I prefer to discuss production control before the final order starts. It is not enough to approve the sample and hope the rest will follow. For waterproof projects, the buyer and supplier should agree on critical points early.
A simple production control table can help:
| Control Item | Why It Matters |
|---|---|
| Gasket material and size | Prevents random substitution |
| Screw type and torque | Keeps compression stable |
| Cable gland model | Avoids mismatched parts |
| Critical cutout tolerance | Protects sealing areas |
| Surface finish thickness | Maintains fit |
| Inspection method | Catches early problems |
| Packaging protection | Avoids gasket damage |
Mass production does not forgive vague thinking.
It rewards clear details.
And after production begins, another hidden enemy can still attack the enclosure from inside: heat.
How Can Poor Thermal Design Accidentally Create Waterproof Failures?
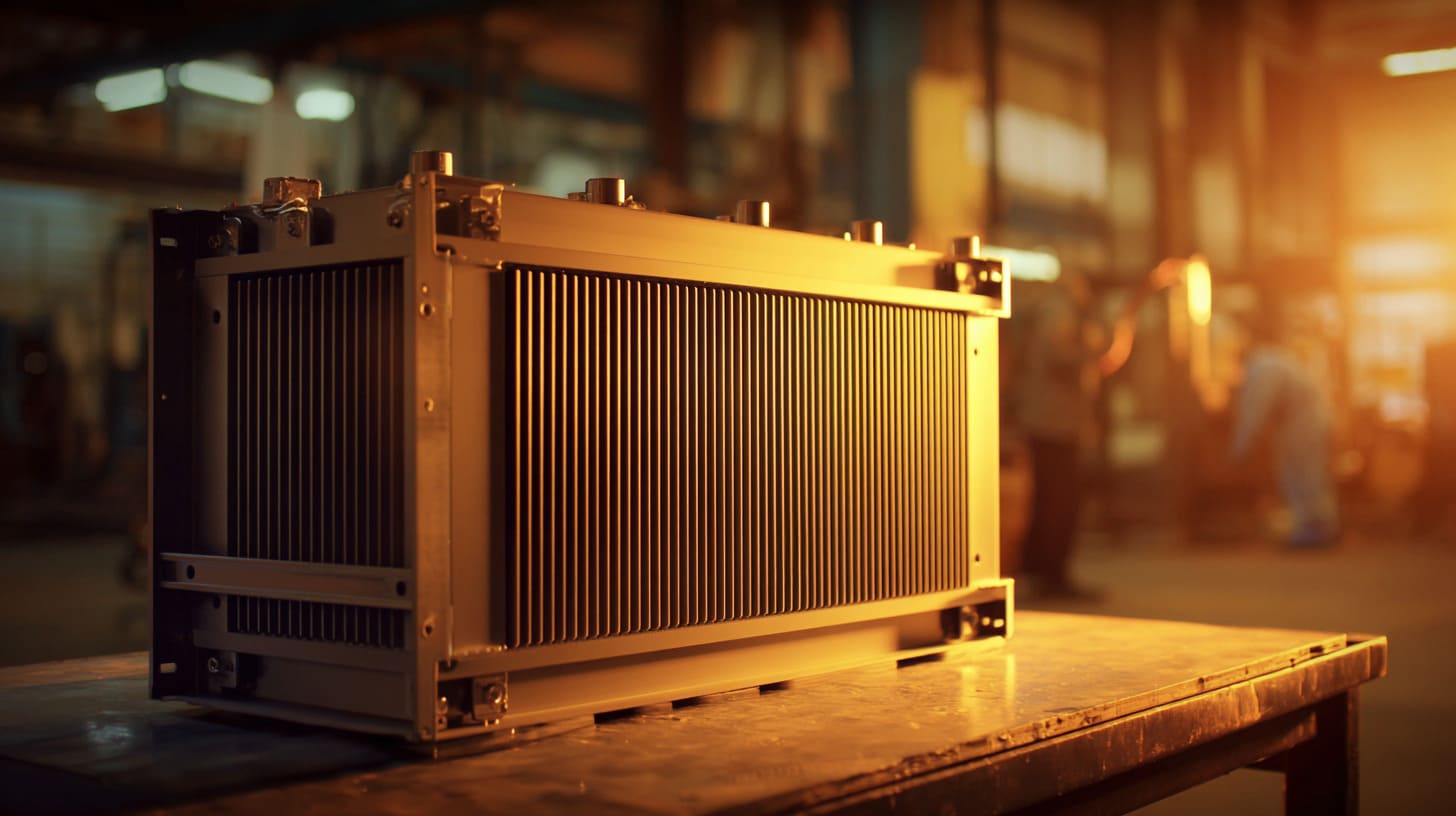
Thermal design and waterproof design often fight each other.
Electronics need cooling.
Waterproof enclosures need sealing.
The product engineer stands in the middle, trying to keep both sides happy.
I have seen this many times in custom aluminum enclosure and Raspberry Pi-style project cases. A customer wants a sealed box because the product will be used outdoors or in an industrial site. But the PCB inside creates heat. The customer then asks for ventilation holes. The holes help heat, but they weaken waterproofing. Then someone suggests a fan. The fan needs an opening. The opening needs a filter or vent. The filter may clog. The vent may not match the IP target.
Suddenly, the simple box is not simple anymore.
A waterproof enclosure that ignores heat may fail because pressure, expansion, condensation, or deformation slowly weakens the seal.
When I review sealed electronics enclosures, I always look at heat as a sealing issue too, not only as an electronics issue.
Heat expansion affects sealing pressure
Materials expand when they heat up.
They contract when they cool down.
Aluminum, plastic, rubber, screws, and internal components all respond differently. Over time, this movement can affect sealing pressure.
If the enclosure heats during operation and cools at night, the gasket may go through repeated compression changes. Screws may loosen slightly. Plastic may deform. Adhesive may age faster. Pressure inside the enclosure may rise and fall.
This is not dramatic at first.
It is slow.
That is why it is easy to ignore.
Aluminum enclosure expansion and contraction
Aluminum is a good material for many electronics enclosures because it is strong, machinable, and good at heat spreading.
But aluminum still expands and contracts with temperature.
For small enclosures, this may not matter much. For larger enclosures, outdoor boxes, or high-heat devices, movement becomes more important.
A long aluminum cover can expand more than a small cover. If the screw layout or gasket design is poor, thermal cycling may slowly reduce sealing stability.
This is one reason I like aluminum enclosures for heat, but I still check the sealing structure carefully.
Aluminum solves some problems.
It does not solve all problems.
Plastic deformation over time
Plastic enclosures can be excellent for many products. They are light, cost-effective, and easy to mold into complex shapes.
But plastic can deform under heat and stress.
If a plastic cover is compressed against a gasket for a long time, and the product operates in a warm environment, the cover may slowly change shape. If screw bosses are weak, they may loosen or crack. If the wall is thin, the sealing pressure may become uneven.
This does not mean plastic is bad.
It means plastic waterproof design needs proper ribs, screw bosses, gasket groove design, and material selection.
| Material | Thermal-Related Waterproof Concern |
|---|---|
| Aluminum | Expansion, screw loosening, surface temperature |
| ABS plastic | Heat deformation if poorly designed |
| PC plastic | Better impact and heat behavior, but cost higher |
| Sheet metal steel | Corrosion protection and seam control |
| Die-cast aluminum | Porosity and surface sealing details |
The material choice should follow the product environment.
Not just the buyer’s first preference.
Screw loosening caused by thermal cycling
Screws can loosen from vibration.
They can also lose clamping force from thermal cycling.
If the enclosure heats and cools repeatedly, the parts expand and contract. The gasket may compress and recover. Over time, the screw pressure may change.
For waterproof designs, screw pressure is sealing pressure.
If screw pressure drops, waterproof performance drops.
Solutions may include:
- Better screw spacing
- Lock washers
- Thread-locking methods
- Metal inserts in plastic parts
- Proper torque control
- Compression stops
- Stronger cover structure
This is where mechanical thinking and waterproof thinking meet.
Ventilation conflicts with waterproofing
Electronics dislike heat.
Waterproof enclosures dislike holes.
That is the conflict.
If the product has low heat, a sealed enclosure may work. If the product has high heat, the enclosure may need heat transfer, vents, fins, or a larger body.
But every vent or fan opening creates a new path for water and dust.
So the question becomes: can we remove heat without opening the enclosure too much?
Sometimes aluminum helps because it transfers heat better than plastic. Sometimes we add heat sink features. Sometimes we use thermal pads to connect hot components to the enclosure wall. Sometimes we redesign the internal layout. Sometimes we use waterproof breathable membranes.
There is no one answer.
There is only the right trade-off for the project.
The challenge of balancing cooling and sealing
A buyer may ask for a fully sealed enclosure and strong cooling at the same time.
That is possible in some designs, but not always simple.
Here are common options:
| Cooling Method | Waterproof Impact |
|---|---|
| Larger aluminum enclosure | Helps heat, keeps sealing easier |
| External heat sink fins | Helps heat, may increase cost and size |
| Thermal pad to enclosure wall | Good for heat path, needs internal design |
| Ventilation holes | Helps airflow, hurts waterproofing |
| Waterproof membrane vent | Helps pressure balance, limited airflow |
| Fan and filter | Helps cooling, high waterproof risk |
| Potting electronics | Protects PCB, affects repair and heat |
If the product needs serious heat removal, waterproof planning must start early.
Adding vents late is like cutting windows into a boat after it is already built.
Maybe it works.
Maybe you sink.
Misuse of ventilation holes
Ventilation holes are often added too casually.
A buyer may say, “Can we add some holes for heat?”
Yes, we can.
But then the enclosure is no longer sealed in the same way.
Even small holes can change the IP target. If the holes face upward or toward water spray, the risk is obvious. If the holes are on the bottom, dust, insects, and water splash may still enter. If the enclosure uses a mesh, the mesh may stop big particles but not water.
Vent holes need a plan:
- Where are they located?
- What water direction will they face?
- Is there a baffle?
- Is there a membrane?
- Does the IP target change?
- Will insects or dust enter?
- Will condensation improve or worsen?
- Can the user clean or maintain the vent?
A hole is not innocent.
A hole is a decision.
Waterproof breathable membrane solutions
Waterproof breathable vents can help some enclosures.
They allow air pressure to balance while blocking water under defined conditions. They can reduce pressure stress on seals. They can also help with condensation risk in some outdoor applications.
But they are not magic stickers.
They have limits:
- They do not remove large amounts of heat like a fan
- They must be installed correctly
- They must match the IP target
- They may clog in dirty environments
- They add cost
- Their position matters
I like breathable vents when pressure balance is the main issue.
I do not like them when someone expects them to solve poor thermal design.
That is asking too much from a small part.
Condensation inside sealed enclosures
Condensation is one of the most confusing waterproof complaints.
A customer opens the enclosure and sees water inside. The first reaction is, “It leaked.”
Maybe it did.
But maybe the moisture came from air trapped inside the enclosure.
When warm humid air cools down, moisture can condense on cold surfaces. This can happen inside sealed enclosures, especially outdoors.
A sealed box can still have moisture inside.
It may come from assembly air. It may come from cables. It may enter during maintenance. It may come through pressure breathing over time.
Why “sealed” does not mean moisture-free
A sealed enclosure is not always dry forever.
If the enclosure is assembled in a humid environment, it may trap humid air inside. If it is opened during field maintenance, humid air may enter. If pressure changes pull air through tiny paths, moisture can enter slowly.
Then temperature drops.
Condensation appears.
This is why outdoor electronics sometimes need:
- Desiccant packs
- Breathable vents
- Better internal coating
- Drainage planning
- Sealed cable glands
- Clear maintenance instructions
- Anti-condensation design
The best solution depends on the product.
But ignoring condensation is not a solution.
Internal humidity buildup
Electronics can create heat.
Heat changes air behavior.
If the enclosure is sealed and the internal temperature rises, the internal air expands. If it cools later, pressure drops. This repeated change can stress seals and pull in moisture through weak points.
If the PCB, cables, foam, or packaging materials contain moisture, they may also release it inside the enclosure.
For sensitive electronics, waterproof design and humidity control should be discussed together.
Water outside is one enemy.
Moisture inside is another.
Pressure changes during transportation and outdoor use
Transportation can also affect sealed enclosures.
Air pressure changes during shipping, especially with altitude changes. Temperature changes during storage can also create internal pressure differences. If the enclosure is tightly sealed, pressure may stress the gasket or make the cover harder to open. If there is a weak seal, pressure changes may pull air and moisture through it.
Outdoor use creates similar pressure changes day and night.
This is why some outdoor enclosures use pressure equalization vents.
Again, the vent must match the application.
A small part can help a lot, but only when used for the right reason.
Heat is sneaky because it does not look like water. But it often helps water win. Still, even if the design is strong, many buyers misunderstand what IP testing can and cannot prove.
Why Do Many Buyers Misunderstand IP Testing?
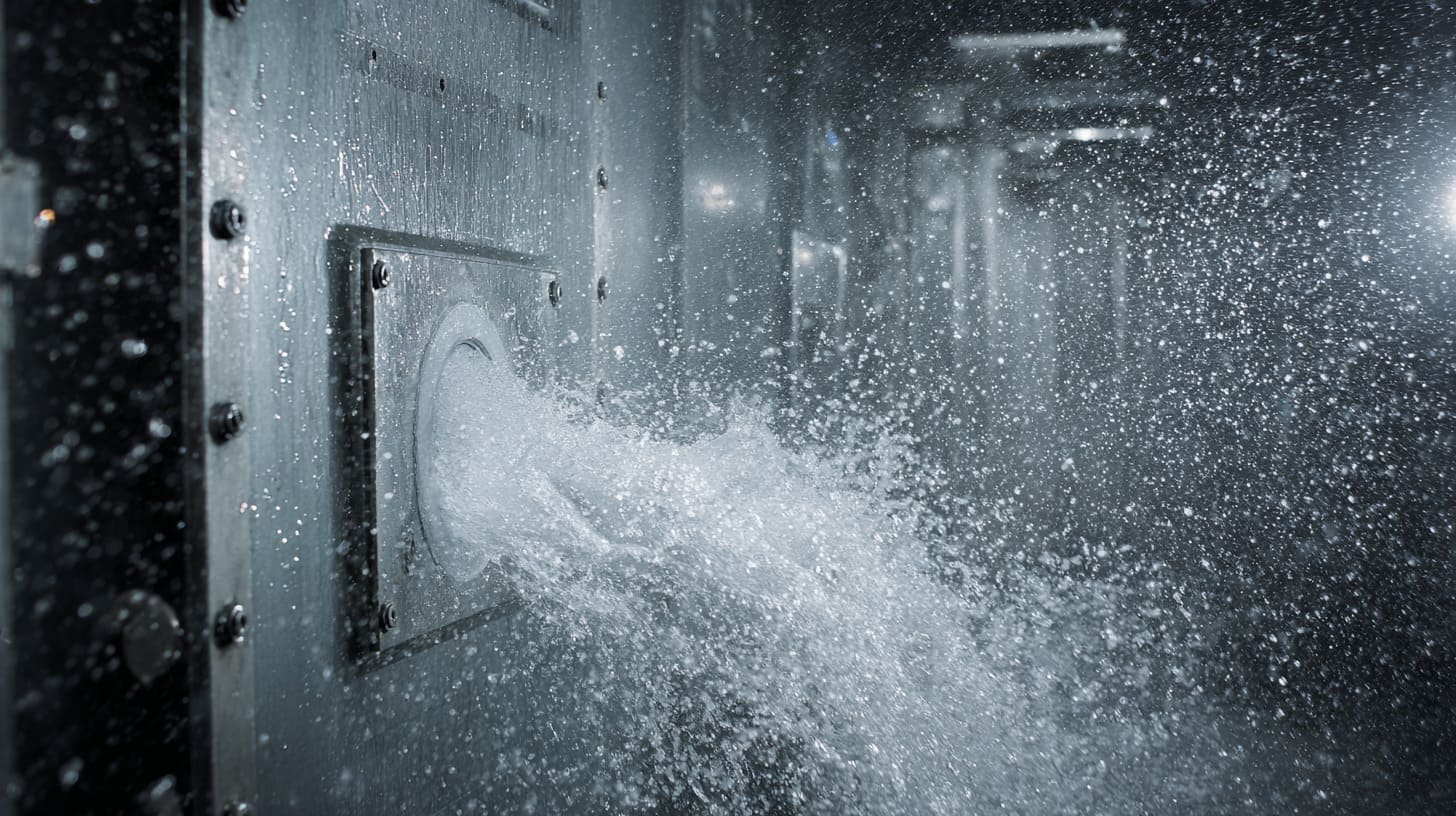
IP testing is useful.
I do not want to make it sound useless. It is important. It gives a clear test method. It helps buyers and suppliers speak the same language. It creates a basic level of confidence.
But IP testing is not a magic shield.
It does not prove that an enclosure will survive every real-world condition. It does not replace good design. It does not remove installation mistakes. It does not guarantee long-term performance after UV aging, vibration, heat, maintenance, and cable movement.
This is where many buyers get disappointed.
They think the IP test is the whole waterproof story.
I see it as one chapter.
Before I rely on an IP test result, I ask what the test setup did not include, because real failures often come from the missing parts of the test.
IP testing is controlled laboratory testing
A lab test has defined conditions.
That is good because it makes testing repeatable. But real life does not always follow lab conditions.
A test may use clean water. The real site may use dirty water, salt water, detergent, or coolant. A test may last for a short time. The real product may face rain for years. A test may use a new sample. The real product may be opened and closed many times.
That gap matters.
| Lab Test Condition | Real-World Difference |
|---|---|
| New sample | Product ages over time |
| Clean water | Site may have chemicals or salt |
| Controlled spray angle | Water may hit from strange directions |
| Fixed test time | Outdoor exposure lasts years |
| Correct assembly | Field installation may be poor |
| No cable movement | Real cables may vibrate or pull |
| Stable temperature | Real sites have heat and cold cycles |
IP testing is a snapshot.
Field performance is a movie.
A snapshot can be useful, but it cannot show the whole story.
Limited test duration and conditions
Many IP tests happen under defined time and pressure conditions.
That is necessary for standard testing. But if the real product faces long exposure, frequent washdown, or harsh outdoor use, the test may not cover everything.
For example, an enclosure may pass a water jet test. But if water sits around a top gasket for weeks, aging and pressure may create another risk. An enclosure may pass temporary immersion when new. But if the gasket hardens after one year, performance may change.
The test result is not false.
It is just limited.
A buyer should understand the limit.
Differences between static testing and real usage
In a lab, the enclosure may sit still.
In real use, the enclosure may vibrate, move, heat up, cool down, and get touched by workers. Cables may be pulled. Connectors may be plugged and unplugged. The cover may be opened for maintenance.
All of these actions affect sealing.
A static test does not always capture dynamic use.
This is especially important for:
- Vehicle-mounted equipment
- Machine control boxes
- Outdoor communication devices
- Portable electronics
- Agricultural equipment
- Marine devices
- Industrial sensor enclosures
If the enclosure moves, the sealing system must handle movement.
A test with a quiet sample on a table may not be enough.
Why passing IP tests does not guarantee field reliability
Passing an IP test means the tested sample passed the defined test conditions.
That is valuable.
But it does not mean every production unit will pass forever in every environment.
Field reliability depends on more factors:
| Factor | Why It Matters |
|---|---|
| Design margin | Allows normal variation |
| Material aging | Affects long-term sealing |
| Assembly control | Keeps production stable |
| Installation quality | Prevents field mistakes |
| Maintenance behavior | Protects gasket after opening |
| Environment | May exceed test conditions |
| Cable movement | Stresses cable entry points |
A certificate should support the design.
It should not replace judgment.
Many failures happen after installation
A waterproof enclosure can leave the factory in good condition and fail after installation.
This is one of the most frustrating cases.
The supplier may say the product was tested. The buyer may say the product leaked. Both sides may be telling the truth.
Installation changes everything.
The enclosure may be mounted on an uneven surface. The cable may pull the gland sideways. The installer may drill extra holes. The cover may not be closed evenly. The gasket may be pinched. The mounting direction may be wrong.
Waterproof performance depends on the final assembled and installed product.
Not just the enclosure body.
Improper mounting surfaces
If an enclosure base is fixed to an uneven wall or frame, the body may twist slightly.
That twist can affect the cover seal.
This is especially true for larger plastic or sheet metal enclosures. A small twist may create uneven gasket pressure. The cover may still close, but one corner may be weaker.
Mounting design should consider:
- Wall flatness
- Mounting hole position
- Internal stress
- Bracket design
- Washer use
- Installation torque
- Cable pulling direction
A strong enclosure can still be hurt by bad installation.
Cable movement and vibration
Cables are not always still.
Machines vibrate. Vehicles move. Workers pull cables. Outdoor wind moves cable runs. A cable gland that seals well at first may weaken if the cable is constantly pulled sideways.
This is why strain relief matters.
If the cable entry must handle movement, the design may need:
- Proper cable gland size
- Strain relief clamp
- Flexible cable routing
- Better gland material
- Locking nut
- Vibration-resistant thread method
- Installation guide
A cable gland is not a handle.
But in the field, some people treat it like one.
Damage during transportation or maintenance
Transportation can damage sealing parts before the product is installed.
A gasket may be compressed badly in packaging. A cover may be scratched. A cable gland may crack. A corner may be dented. A small seal ring may fall out.
Maintenance can also create risk.
Each time a cover opens, the gasket faces possible damage. Dust may enter. Screws may be lost. Workers may tighten screws unevenly. A gasket may not return to the correct position.
For products that need frequent maintenance, the waterproof design should be more forgiving.
If the enclosure will be opened often, I prefer stronger gasket positioning and clearer screw design. A one-time sealed box and a frequently opened service box should not be treated the same.
Some suppliers optimize only for the test
This is uncomfortable, but it happens.
Some suppliers only care about passing the test once.
They may add temporary sealant. They may tighten screws too much. They may test a carefully selected sample. They may use methods that are hard to repeat in mass production.
The test passes.
But the real product is still weak.
I do not like this approach because it creates future conflict. The buyer thinks the product is reliable. The supplier thinks the job is done. The end user discovers the truth later.
That is not good business.
Temporary sealing methods
Temporary sealing can include:
- Extra silicone applied by hand
- Over-tightened screws
- Special assembly only for the test sample
- Selected best parts
- Added tape or glue not used in production
- Extra care not included in normal process
Sometimes extra sealing is necessary and agreed.
That is fine.
The problem is when it is not disclosed or not repeatable.
If a sealing method is needed, it should be part of the production process. It should not be a secret trick used only for testing.
Test-focused design shortcuts
Some designs are created to pass the test, not to survive real use.
For example, the enclosure may pass when it is new and untouched. But after the cover is opened three times, the gasket shifts. Or it may pass without cables installed, but fail after real cable installation. Or it may pass in one mounting direction, but fail when the customer installs it differently.
This is why test conditions should match real use as closely as possible.
If the enclosure will be used with cable glands and connectors, the test sample should include them.
If the enclosure will be mounted vertically, test orientation should be discussed.
If the product will be opened for maintenance, repeated opening tests may be useful.
Lack of long-term durability validation
Long-term durability is harder to test.
It takes time. It costs money. It may require aging tests, thermal cycling, vibration tests, salt spray tests, or real environment trials.
Not every project needs all of these.
A simple indoor enclosure does not need the same validation as an outdoor industrial control box.
But for high-value OEM projects, buyers should not rely only on one water test.
They should think about the full life of the product.
IP testing gives confidence. But if the buyer only looks at the certificate, they may miss the real weak points. So the better move is to reduce risk before production starts.
How Can Buyers Reduce Waterproof Enclosure Risks Before Production?
Buyers can reduce many waterproof risks before production.
Not all risks.
But many.
The best time to fix a waterproof problem is before tooling, before mass production, and before the first batch is packed in cartons. At that stage, changes are still possible. A hole can be moved. A gasket can be changed. A screw can be added. A gland can be upgraded. A cover can be strengthened.
After production, every change becomes slower and more expensive.
This is why early communication matters so much in OEM enclosure projects.
I know buyers are busy. Engineers have deadlines. Purchasing teams want prices. Product managers want progress. Nobody wants to slow down and discuss gasket compression for half a day.
But waterproof design punishes rushed decisions.
When I handle waterproof custom enclosure work, I would rather ask ten boring questions early than answer one angry email after shipment.
Define the real application environment clearly
The first step is to describe the real environment.
Not with one word.
Not just “outdoor.”
Not just “waterproof.”
The buyer should explain how the enclosure will live.
| Question | Useful Answer Example |
|---|---|
| Where will it be used? | Outdoor wall, factory machine, marine device |
| What water will it face? | Rain, washdown, splash, immersion |
| Which direction will water hit? | Top, side, cable entry area |
| Will it face chemicals? | Cleaning liquid, coolant, salt spray |
| Will it face heat? | Internal PCB heat, sun exposure |
| Will it vibrate? | Machine, vehicle, moving equipment |
| Will users open it? | Never, monthly, weekly |
| How long should it last? | 1 year, 3 years, 5 years |
This information helps the supplier make better suggestions.
Without it, the supplier can only guess.
And guessing is a bad foundation for waterproof design.
Outdoor, marine, industrial, or washdown usage
Different environments need different thinking.
Outdoor rain protection is not the same as marine use. Marine use adds salt and corrosion. Industrial washdown adds water pressure and chemicals. A dusty factory adds particles that may damage seals during maintenance.
| Environment | Main Design Focus |
|---|---|
| Outdoor general use | Rain, UV, condensation, cable direction |
| Marine use | Salt corrosion, stainless parts, gasket aging |
| Industrial washdown | Spray pressure, chemical resistance, gland strength |
| Machine-mounted use | Vibration, cable strain relief, screw locking |
| Indoor humid use | Condensation, sealing, ventilation |
| Solar or energy use | Heat, rain, long outdoor aging |
When the environment changes, the right design changes.
This is why a copied enclosure design often fails in a new application.
Exposure to chemicals, sunlight, or vibration
Chemical exposure affects gasket and plastic parts.
Sunlight affects plastic, rubber, and coatings.
Vibration affects screws, cable glands, and connectors.
These risks do not always show up in a simple water test.
So buyers should state them clearly before quotation.
For example:
- “The enclosure will be cleaned with detergent every day.”
- “The product will be mounted on a moving machine.”
- “The cable gland will face direct sunlight.”
- “The enclosure will be installed near the sea.”
- “The customer may open the cover for maintenance every month.”
These sentences are gold.
They help the supplier avoid blind design choices.
Required lifespan expectations
A product that needs to last six months does not need the same design as a product that needs to last five years outdoors.
This is not only about quality.
It is about matching cost and risk.
If the buyer wants long service life, the design may need better gasket material, better surface treatment, stronger cable glands, better screws, and more testing. That costs more at the beginning, but it may save much more later.
If the product is short-term or used in a mild environment, a simpler design may be enough.
The point is not always to choose the highest-cost solution.
The point is to choose the right level of protection.
Review sealing details early with suppliers
Early review is where many problems can be caught.
The buyer should not wait until the sample fails.
The supplier should review the drawing and point out risks before production.
A good review should include:
- Cover and base sealing structure
- Gasket path
- Screw layout
- Cable entry points
- Connector openings
- Surface flatness
- Material thickness
- Thermal design
- Installation direction
- Maintenance behavior
This review does not need to be fancy.
Even marked-up drawings and clear photos can help.
Gasket material confirmation
The gasket should be confirmed clearly.
Not just “rubber gasket.”
The project should define material, hardness if needed, size, shape, installation method, and replacement plan.
For custom projects, I like to confirm:
| Gasket Detail | Why It Matters |
|---|---|
| Material | Chemical, heat, UV, and water resistance |
| Size | Compression and fit |
| Shape | Contact area and groove match |
| Hardness | Sealing pressure |
| Installation | Manual, adhesive, molded, inserted |
| Joint method | Avoids leak path |
| Replacement | Needed for maintenance products |
A gasket is cheap compared with the cost of a failed batch.
So it deserves attention.
Cable entry design review
Cable entry should be reviewed like a critical part, not an afterthought.
For each gland or connector, the buyer and supplier should confirm:
- Cable diameter
- Gland model
- Hole size
- Thread type
- Panel thickness
- Sealing ring
- Installation direction
- Clearance inside the enclosure
- Field installation method
If the buyer will install cables later, the supplier should know that.
If the supplier installs cable glands before shipment, inspection can be controlled at the factory.
Different supply methods create different risks.
Screw structure and seam inspection
Screws and seams should be checked before production.
I look for pressure balance.
Where are the screws? How far apart are they? Is the cover stiff enough? Are corners supported? Does the gasket path stay continuous? Is the seam exposed to direct water? Will the user open this cover often?
A simple checklist can help:
| Area | Check |
|---|---|
| Corners | Enough screw pressure and smooth gasket path |
| Long sides | No excessive cover flex |
| Seams | Continuous sealing and no weak gaps |
| Screw bosses | Strong enough for repeated tightening |
| Cover | Flat and stiff enough |
| Base | Not easily twisted during mounting |
Good waterproofing is not only about adding parts.
It is about controlling force.
Request realistic validation instead of only IP certificates
An IP certificate can be helpful.
But for custom OEM projects, buyers should also ask for practical validation.
This does not always mean expensive third-party testing. It can start with simple, realistic checks.
For example:
- Assembly photos
- Gasket close-up photos
- Cable gland installation photos
- Water spray pre-test
- Internal paper test
- Sample disassembly check after testing
- Multiple sample testing
- Pre-production inspection
The goal is not to create paperwork.
The goal is to find weak points before shipment.
Assembly verification photos
Photos can reveal many problems.
A supplier can send photos showing:
- Gasket position
- Cable gland installation
- Screw layout
- Inner structure
- Connector sealing
- Surface finish
- Packaging protection
Photos are not a replacement for testing.
But they help both sides see the same details.
This matters a lot when buyers and suppliers work across time zones.
A photo can avoid three days of unclear emails.
Pre-production waterproof testing
Before mass production, testing several pre-production units is better than testing one perfect sample.
The buyer can ask the supplier to test samples from normal production setup, not only the handmade prototype.
This helps catch process issues.
For serious projects, a third-party test may also be useful. But the sample must represent the real product:
- Same material
- Same gasket
- Same cable glands
- Same connectors
- Same surface finish
- Same assembly method
- Same installation direction if possible
Testing a simplified box without real openings may create false confidence.
Real-world simulation testing
Some risks are not covered by basic IP testing.
Depending on the project, buyers may consider simple real-world simulation:
| Real Use Risk | Possible Check |
|---|---|
| Frequent opening | Open-close cycle test |
| Outdoor heat | Heat aging or temperature cycle |
| Cable movement | Pull or vibration check |
| Washdown | Spray test with real gland orientation |
| Condensation | Temperature change observation |
| Shipping damage | Packaging drop or vibration check |
Not every project needs all of this.
But thinking about real use helps buyers choose the right validation.
Work with suppliers experienced in custom enclosure engineering
A supplier should not only make the box.
A good supplier should help find risks.
This is especially important for custom enclosure projects because buyers often need redesign, logo printing, special holes, packaging, and different materials.
An experienced supplier can say:
- “This hole is too close to the gasket.”
- “This cable gland may not match your cable.”
- “This surface may not seal well after powder coating.”
- “This cover may need more screws.”
- “This vent will reduce waterproof performance.”
- “This design may pass the sample test but be unstable in production.”
These comments may slow the project for one day.
But they may save the project later.
Faster engineering communication
Communication speed is not only about customer service.
It affects technical risk.
If the supplier is slow to confirm details, the buyer may make decisions with incomplete information. If drawings are not checked carefully, problems move into production. If time zones slow down every question, the project loses momentum.
For waterproof projects, clear communication should cover:
- Design review
- Risk comments
- Material confirmation
- Sample feedback
- Test method
- Production control
- Packaging
- Installation notes
A waterproof enclosure is built from details.
So the communication must be detail-friendly.
Better tolerance management
Custom enclosures need tolerance control.
Especially when waterproofing is involved.
A supplier should know which dimensions are critical and which are less important. For example, an outside length tolerance may not affect waterproofing much. But a gasket groove depth or cable gland hole diameter may be critical.
Critical tolerances should be marked and inspected.
This helps avoid wasting energy on cosmetic dimensions while missing sealing dimensions.
More reliable OEM waterproof solutions
For OEM buyers, reliability is not only about one order.
Their own brand reputation is involved.
If an enclosure leaks, the end customer may blame the buyer’s product, not the enclosure factory. That is why OEM buyers need suppliers who understand the product use, not just the drawing.
A reliable OEM waterproof solution should balance:
- Appearance
- Cost
- Sealing performance
- Production consistency
- Branding needs
- Packaging
- Delivery time
- Field installation
The best solution is not always the most expensive one.
It is the one that fits the real project and survives real use.
Once buyers understand how to reduce risk early, the next question becomes sharper: what mistakes should they avoid first?
What Are the Most Common Waterproof Design Mistakes in OEM Projects?
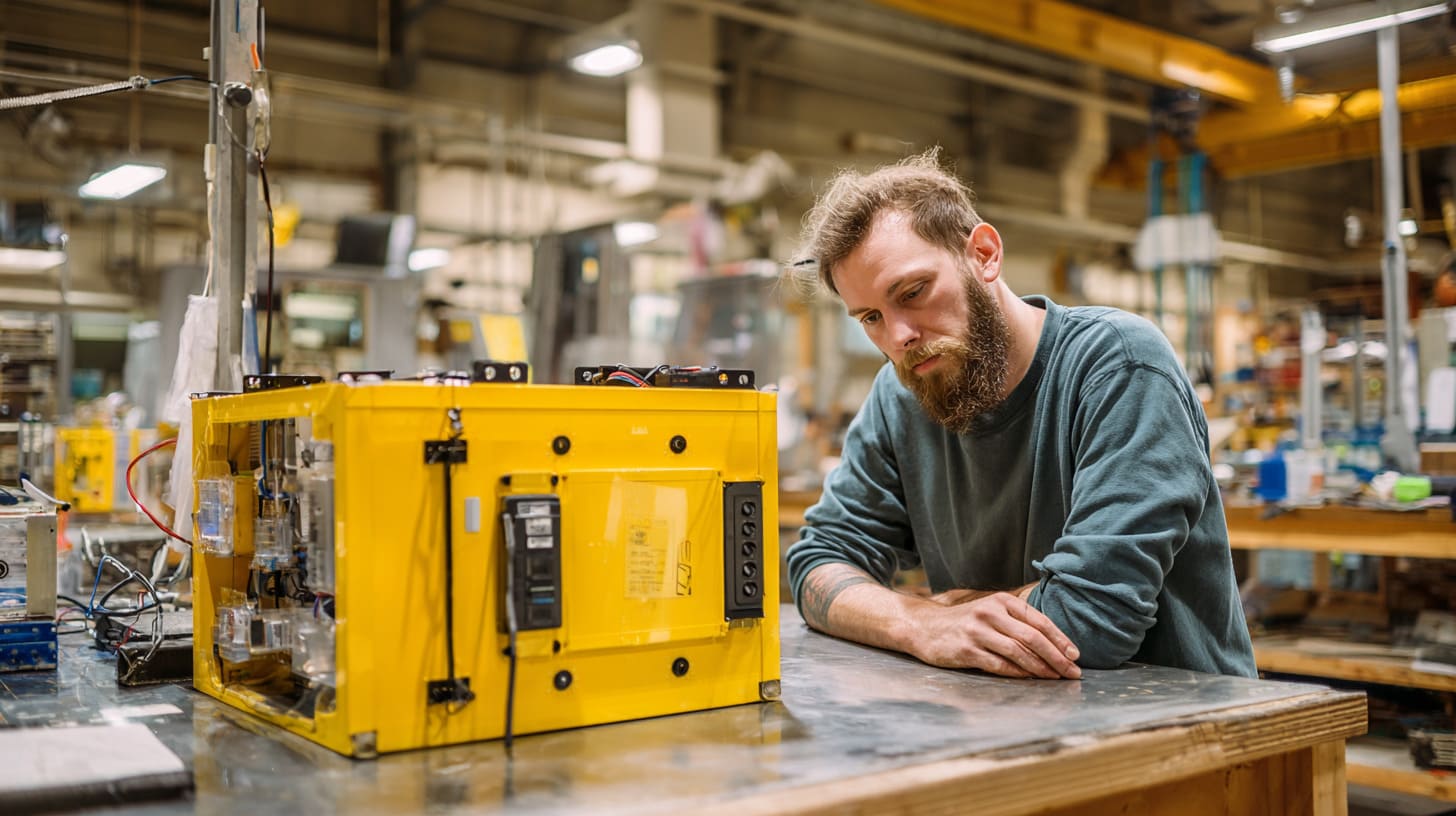
OEM projects fail for many reasons, but waterproof failures often come from repeated mistakes.
I see the same patterns again and again.
A buyer copies an existing design. A new cutout is added late. The gasket is chosen casually. The environment is described too vaguely. The supplier gives a price fast but does not challenge the design. Everyone wants to move quickly.
Then the sample arrives.
It looks good.
Then testing begins.
That is when the old mistakes wake up.
I usually become most cautious when a waterproof project looks too easy at the quotation stage, because easy-looking drawings often hide the most expensive details.
Copying existing enclosure designs without understanding the application
Copying is common in OEM work.
A buyer may say, “We want something similar to this enclosure, but with our logo and some changes.”
That is normal. Many projects start from a reference product.
But copying without understanding is risky.
The original enclosure may have been designed for indoor use. The new product may be outdoor. The original may have no cable movement. The new one may be installed on a machine. The original may use a specific gasket. The new supplier may choose another material.
The shape looks the same.
The risk is not the same.
Before copying a design, buyers should ask:
- What environment was the original design made for?
- What IP rating did it really achieve?
- Were the cable entries part of the test?
- Will our custom holes change the sealing path?
- Are we changing material or thickness?
- Are we changing the gasket or surface finish?
- Will our users install it differently?
A copied design is only a starting point.
It is not proof.
Prioritizing low cost over sealing reliability
Every buyer cares about cost.
I understand this very well. In B2B projects, price affects profit, market position, and order decisions. A small cost increase can matter when the order quantity is large.
But cutting cost in the wrong place can destroy waterproof reliability.
The dangerous cost cuts often happen in small parts:
| Cost Cut | Possible Risk |
|---|---|
| Cheaper gasket | Aging, poor compression, chemical failure |
| Fewer screws | Uneven sealing pressure |
| Thinner material | Cover flex and deformation |
| Cheaper cable gland | Leakage at cable entry |
| Lower surface quality | Poor gasket contact |
| No pre-production test | Hidden batch risk |
| Simple packaging | Damage during shipping |
The question is not “Can we reduce cost?”
Of course we can try.
The better question is “Which cost can be reduced without damaging the sealing logic?”
Sometimes we can simplify appearance. Sometimes we can adjust packaging. Sometimes we can use a standard enclosure size. Sometimes we can reduce machining complexity.
But I do not like saving a few cents on the part that keeps water out.
That is bad math.
Adding too many custom openings late in development
Late changes are dangerous.
A buyer may approve the sample, then suddenly need one more connector hole. Then another switch. Then a small LED window. Then an antenna hole.
Each change may look small.
But together, they change the waterproof design.
Late openings can create several risks:
- Weak panel strength
- Reduced gasket pressure
- More sealing parts
- More assembly errors
- More tolerance problems
- More field installation risk
- Higher testing uncertainty
If a new opening is needed, the waterproof design should be reviewed again.
Not just the price.
Not just the lead time.
The structure must be checked.
I have learned to respect small holes. They are small only on the drawing. In real waterproof design, they can become very loud.
Ignoring installation and maintenance conditions
Many buyers focus on the factory-made enclosure.
But the enclosure has a life after shipment.
It will be installed, wired, opened, cleaned, moved, or repaired. If the design ignores those actions, waterproof performance may fail later.
For example:
- The cover may need to open often
- Workers may replace cables
- The enclosure may be mounted in a hard-to-reach place
- The cable entry may face upward
- The product may be cleaned with water spray
- The user may lose screws during service
- The gasket may be pinched after maintenance
These are not rare events.
They are normal life.
A design should be friendly to normal life.
Assuming “waterproof” means maintenance-free
Waterproof does not mean the product never needs care.
Gaskets age. Screws loosen. Cable glands may be damaged. Covers may be opened. Seals may collect dust. Outdoor products may face UV and temperature changes.
For some products, maintenance is part of waterproof reliability.
The buyer should think about:
| Maintenance Item | Why It Matters |
|---|---|
| Gasket inspection | Finds damage before leakage |
| Screw tightening check | Maintains compression |
| Cable gland check | Prevents cable entry leaks |
| Cleaning method | Avoids chemical damage |
| Replacement seal parts | Extends product life |
| Installation guide | Reduces user mistakes |
This is especially important for products sold under the buyer’s brand.
End users may not understand enclosure design. They only know the product failed.
So clear maintenance and installation instructions protect both the product and the brand.
OEM waterproof mistakes usually look small at first. That is why they are dangerous. The real skill is not fixing every leak after it appears, but learning to see where the leak is likely to begin.
Conclusion
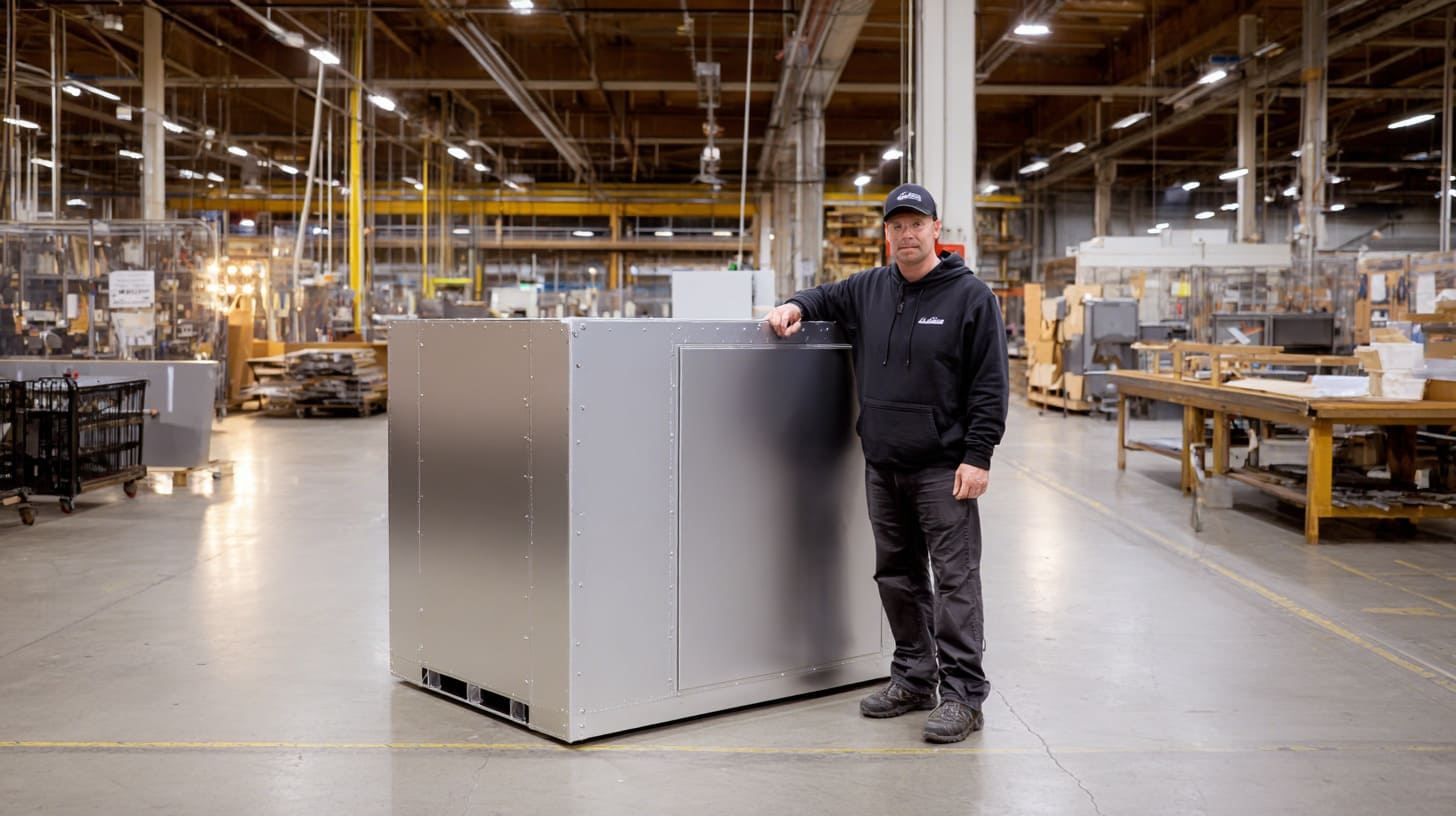
I do not see IP testing as the beginning of waterproof enclosure reliability.
I see it as the final checkpoint.
That view comes from real project work, not from a textbook.
In custom enclosure manufacturing, I have seen too many projects where the problem was already inside the drawing, the cable entry, the gasket choice, the screw layout, the thermal design, or the production process. The IP test only revealed the problem. It did not create it.
That is why I care so much about early review.
I would rather spend more time asking about the installation environment than rush to quote a “waterproof box.” I would rather question a cable gland position than pretend every hole is safe. I would rather tell a buyer that a design has risk than stay quiet and wait for testing to embarrass both sides.
This is not because I like making projects slower.
I do it because waterproof failure is expensive.
It costs sample time. It delays launches. It creates extra freight cost. It damages trust. It may hurt the buyer’s own brand if the enclosure is already used with their product.
My simple belief is this:
Most waterproof enclosure problems are not testing problems. They are thinking problems.
Someone did not ask enough questions.
Someone trusted a rating too quickly.
Someone copied a design without checking the new environment.
Someone added holes without reviewing the sealing path.
Someone chose price over the small parts that actually keep water out.
For OEM and ODM buyers, the better path is clear.
Start waterproof planning before production. Define the real environment. Review cable entries. Confirm gasket material. Check screw pressure. Think about heat and condensation. Test realistic samples. Make sure the production process can repeat the sample result.
If you are working on a custom aluminum enclosure, plastic enclosure, sheet metal enclosure, or Raspberry Pi-style project enclosure, and waterproof performance matters, do not wait until IP testing to ask the hard questions.
Ask them while the design is still flexible.
That is where good projects are saved.
If you have a custom enclosure project and you are not sure whether your current waterproof design is safe enough, you can send us your drawing, application environment, and target IP rating. At MaidaTech, we can help review the structure, cable entries, gasket design, and production risks before the project moves too far.
A waterproof enclosure should not just pass a test.
It should survive the place where your customer actually uses it.







