 Skip to content
A strange thing happens in many OEM enclosure projects.
The buyer thinks the real project starts when tooling starts.
The factory knows the project has already been shaped much earlier.
Before the mold is opened, before the aluminum is cut, before the sample is packed into a carton, many important decisions have already been made. Some are clear. Some are hidden. Some are guessed. Some are never discussed at all.
And this is where many OEM enclosure problems quietly begin.
I have seen projects where the customer sent a beautiful 3D drawing. The enclosure looked clean. The logo position looked nice. The screw holes looked correct. The buyer felt ready. The purchasing team wanted a quick quotation. Everyone wanted to move fast.
But after we checked the file, small questions started to appear.
Where does the cable exit?
How much heat does the board produce?
Will the enclosure be used indoors or near outdoor moisture?
Does the customer need anodizing or powder coating?
Is the PCB size final, or is it still changing?
Will the customer assemble the unit by hand, or will it go into a production line?
These questions may look small. They are not small.
They are the quiet doors where cost, delay, and redesign can enter the project.
In my work with custom aluminum enclosures, plastic enclosures, sheet metal enclosures, and Raspberry Pi-style cases, I have learned one simple truth: tooling does not usually create the problem. Tooling often reveals the problem that was already there.
That is why I believe most OEM enclosure failures are not “factory accidents.” Many of them are preparation problems. They happen because the project was pushed forward before the engineering details were mature enough.
And once tooling starts, every mistake becomes more expensive.
A wrong hole in a drawing is just a revision.
A wrong hole in tooling is money, delay, and sometimes a painful email at midnight.
So let’s talk about the real beginning of an OEM enclosure project.
Not the mold.
Not the machine.
The thinking before the tooling.
What Happens Before Tooling in an OEM Enclosure Project?

Before tooling begins, an OEM enclosure project should already have a clear direction. I do not mean every small detail must be perfect. That is not realistic. But the important details should be discussed, checked, and challenged.
Many buyers think the early stage is only about quotation. I understand why. They need price. They need lead time. They need to report to their boss or customer.
But from the factory side, the early stage is not only quotation. It is risk detection.
If we miss the risk before tooling, we usually pay for it later.
For me, the first serious decision is not “how fast can we make it?” It is “do we really understand what this enclosure must survive after it leaves the factory?”
Defining the product requirements
The first step is to define what the enclosure needs to do.
This sounds simple. But many OEM enclosure requests start with only a drawing and a sentence like:
“Please quote this aluminum enclosure.”
That is not enough.
An enclosure is not only a box. It protects something. It connects to something. It carries heat. It may face dust, water, vibration, UV light, hand assembly, rough shipping, or a user who has no patience for small defects.
A good requirement discussion should cover at least these points:
| Requirement area | What I need to know | Why it matters |
|---|---|---|
| Size | Outer size, inner size, wall thickness | It affects material use, tooling, assembly, and shipping |
| Material | Aluminum, plastic, steel, sheet metal | It affects strength, heat, cost, weight, and appearance |
| Thermal need | Heat source, power level, heat sink contact | It affects vents, fins, material, and internal clearance |
| Waterproof level | Indoor, outdoor, splash, rain, washdown | It affects gasket, screws, cable glands, and structure |
| EMC need | Shielding requirement, grounding design | It affects material choice and contact design |
| Mounting | Wall mount, DIN rail, desktop, panel mount | It affects hole positions and bracket design |
| Branding | Logo printing, engraving, label, color | It affects surface treatment and process order |
| Packaging | Bulk packing or retail packing | It affects scratches, shipping safety, and customer experience |
I have had customers who focused only on the outside size. But the inside space was more important. The PCB had connectors on both sides. One connector needed extra finger space for plugging and unplugging. The drawing looked fine on screen, but in real use, the customer’s hand could not reach the connector comfortably.
That kind of problem does not look dramatic.
But it annoys the end user every single day.
Aligning engineering expectations
A customer drawing shows what the buyer wants.
A factory review shows what can be produced well.
These two things are not always the same.
I like drawings. A clear drawing saves time. A 3D file saves even more time. But a drawing can also hide problems. The model may look clean, but the wall may be too thin. The corner may be too sharp. The screw boss may be too weak. The cover may look easy to assemble, but it may scratch the surface during installation.
This is why engineering alignment matters before tooling.
Here is how I usually look at the difference:
| Customer design view | Factory engineering view |
|---|---|
| “This shape looks good.” | “Can this shape be manufactured with stable quality?” |
| “The hole position is correct in CAD.” | “Will the real connector still align after tolerance?” |
| “The surface should look premium.” | “Which finish can keep color and scratch resistance stable?” |
| “The enclosure needs to be waterproof.” | “Where will the gasket sit, and how will the screws compress it?” |
| “The sample passed.” | “Can 1,000 pieces pass with the same result?” |
This is where many projects become dangerous. The buyer sees the design as almost finished. The factory sees the design as not yet production-ready.
Both sides may be sincere.
But sincerity does not fix a bad structure.
Confirming production methods early
The production method should be discussed early because it controls cost, MOQ, lead time, and design limits.
For enclosures, common methods include:
| Process | Best for | Main advantage | Common risk |
|---|---|---|---|
| CNC machining | Low quantity, high precision, prototypes | Flexible and accurate | Unit cost can be high |
| Die casting | Higher volume aluminum parts | Good shape freedom and lower unit cost at volume | Tooling cost and design rules matter |
| Extrusion | Long aluminum profiles, simple cross-sections | Stable and efficient for certain shapes | Limited shape flexibility |
| Sheet metal | Industrial boxes, control panels, cabinets | Strong and cost-effective | Bending limits and surface finish need planning |
| Plastic injection molding | High volume plastic enclosures | Good repeatability | Tooling cost and material shrinkage risks |
One mistake I often see is choosing the process too late.
A customer may design an enclosure as if it will be CNC machined. Then later, they want die casting pricing. But the design may not suit die casting. Draft angles, wall thickness, ribs, bosses, and parting lines all matter.
Another customer may design a plastic enclosure and expect aluminum-like stiffness. That can create disappointment.
The production method is not just a factory detail. It is part of the design.
A small example: if the enclosure needs many deep internal features, CNC may become slow and expensive. But if the customer has high volume, die casting may be better. The problem is that die casting needs tooling, and tooling needs the design to be mature.
So the earlier we confirm the process, the fewer painful surprises we face later.
The project may still look calm at this stage. But this is only the clean table before lunch. Once communication begins, crumbs appear everywhere.
Why Poor Communication Creates OEM Enclosure Problems Early

OEM enclosure projects are technical, but many failures are not caused by technology.
They are caused by weak communication.
I do not say this to blame buyers or suppliers. Communication across countries is hard. Time zones are real. Language is not always perfect. Engineers are busy. Salespeople may not understand every detail. Buyers may be under pressure.
But the enclosure does not care about our excuses.
If one detail is misunderstood, the metal will still be cut according to the wrong understanding.
One thing I have learned the hard way is that a fast reply is not always good communication; a clear reply is much more valuable when the design still has open questions.
Incomplete requirement discussions
Many enclosure problems begin because the first discussion is too thin.
A buyer may send:
- 3D model
- Logo file
- Quantity
- Target price
- Expected delivery time
That is a start. But it is not a complete engineering request.
For an OEM enclosure, I also want to ask:
- Is the PCB size final?
- Are the connector positions final?
- What is the maximum component height?
- Does the enclosure need ventilation?
- Will the customer install a fan or heat sink?
- Will cables pull on the connector during use?
- Does the product need to pass any test?
- Will users open the enclosure often?
- Is the enclosure exposed to sunlight, dust, oil, or moisture?
These questions may slow down the first quotation. But they can save weeks later.
Here is a simple example.
A customer once wanted a small aluminum enclosure for an electronic control board. The drawing showed a side cutout for a connector. The connector dimension looked clear. But we asked one more question: “Will the connector have a cable plugged in during operation?”
The answer was yes.
Then we checked the cable bend space. The cutout was fine, but the cable needed more room near the side wall. If we had made the tooling directly, the connector would have fit, but the cable would have been forced into an awkward angle.
That is a classic OEM enclosure problem.
The part is correct.
The product is wrong.
Time zone and language barriers
Time zone problems are boring until they cost money.
A buyer in Europe sends a question in the afternoon. We receive it at night. We reply the next morning in China. They read it after lunch. One small detail can take two days to confirm.
Now imagine this happens with ten small details.
The project does not move slowly because people are lazy. It moves slowly because every question crosses time, language, and technical context.
This is why clear communication records are very important.
| Weak communication | Better communication |
|---|---|
| “Make the hole bigger.” | “Increase the USB-C cutout width from 9.2 mm to 10.0 mm.” |
| “Use black finish.” | “Use matte black powder coating, texture similar to sample A.” |
| “Need waterproof.” | “Target IP65 for indoor industrial splash environment.” |
| “Logo on top.” | “Laser engrave logo at center of top cover, 35 mm wide.” |
| “Same as sample.” | “Same structure as sample, but change wall thickness to 2.0 mm.” |
Small words can carry big risk.
“Bigger” is not a dimension.
“Waterproof” is not a standard.
“Black” is not a finish.
“Strong” is not a material specification.
When a buyer writes these words, I understand the meaning in a general way. But manufacturing needs exact information. The machine does not understand “a little bigger.” The toolmaker needs numbers.
Different expectations between engineers and sales teams
Another problem appears when sales and engineering do not think the same way.
A sales team wants to win the order. That is natural. A buyer wants fast price and fast confirmation. That is also natural. But engineering needs to slow down and ask uncomfortable questions.
This is not always popular.
A sales reply may say:
“Yes, we can make it.”
An engineer may say:
“We can make it, but this screw boss is risky, and the wall near the connector may deform.”
Those are very different answers.
For OEM enclosure projects, I prefer the second answer. It may feel slower. It may feel less pleasant. But it protects the project.
A factory that only says yes can be dangerous.
A factory that says “yes, but we need to adjust this detail” is often more useful.
Here is the simple difference:
| Role | Main concern | Possible blind spot |
|---|---|---|
| Buyer | Price, delivery, project deadline | May push too fast before details are mature |
| Salesperson | Win the order, reply quickly | May not see deep engineering risk |
| Engineer | Structure, tolerance, process | May explain too technically |
| Production team | Stable mass production | May receive problems too late |
| Quality team | Inspection and defect control | May lack clear approval standards |
The best projects happen when these roles talk early.
Not after tooling.
Not after the first failed sample.
Early.
And once the communication is clear, the next question becomes even more serious: did we actually validate the design, or did we only look at a nice file?
How Weak Design Validation Leads to Costly Tooling Changes

Design validation is where confidence should be tested.
A drawing can look convincing. A rendering can look beautiful. A prototype can even look successful. But validation asks a harder question:
Can this design survive real production and real use?
This is where many OEM enclosure projects become uncomfortable.
Nobody wants to hear that the approved design still has risk. The buyer may already have shown the sample to their customer. The project timeline may already be tight. The purchasing manager may already be asking for tooling.
But weak validation is like walking across a bridge in the dark because the first three steps felt safe.
My personal rule is simple: I do not trust a design only because it looks clean; I trust it more when it has been checked against assembly, tolerance, material behavior, and real user handling.
Prototype approval does not guarantee mass production success
A prototype is useful.
But a prototype is not a promise.
Many buyers treat the prototype as the final proof. I understand that. If the prototype looks good and the board fits, it feels like the project is ready. But prototypes are often made by different methods from mass production.
A CNC prototype may have sharp details and tight control. A die-cast part may need draft angles and may show different surface behavior. A plastic molded part may shrink. A sheet metal enclosure may change slightly after bending and coating.
This is why sample approval needs context.
| Prototype result | What it proves | What it may not prove |
|---|---|---|
| PCB fits inside | Basic internal space is close | Tolerance stack-up in mass production |
| Surface looks good | Finish direction may be acceptable | Color stability across batches |
| Screws assemble well | One sample can be assembled | Long-term thread strength |
| Connector aligns | One part aligns | Variation across 500 or 5,000 pieces |
| Packaging works once | One shipment may be safe | Rough long-distance shipping damage |
A prototype is like a first handshake.
It tells you something.
But it does not tell you the full personality of the project.
Ignoring tolerance stack-up problems
Tolerance stack-up is one of those topics that sounds boring until it destroys a project.
Every part has small variation. The PCB has variation. The enclosure has variation. The connector has variation. The screw has variation. The coating adds thickness. The gasket compresses differently. The assembly worker may apply different pressure.
Each small variation may be acceptable alone.
Together, they may create a problem.
For example, let’s say:
- The PCB mounting hole is slightly off.
- The enclosure screw post is slightly off.
- The USB connector is slightly higher than expected.
- The side cutout is just tight enough.
- The coating adds a little thickness.
Now the connector rubs against the enclosure.
The customer says the hole is wrong.
The factory says the drawing was followed.
Both sides may be partly right.
The real issue is that the design did not leave enough safety margin.
For OEM enclosures, I pay close attention to these areas:
| Risk area | What can go wrong | Safer thinking |
|---|---|---|
| PCB screw holes | Board cannot sit flat | Add tolerance and confirm PCB final file |
| Connector cutouts | Connector rubs or looks off-center | Check real connector and cable space |
| Heat sink contact | Poor thermal transfer | Confirm contact pressure and flatness |
| Cover assembly | Cover scratches or does not close smoothly | Check assembly path, not only final position |
| Gasket groove | Waterproof failure | Check compression, screw spacing, and material |
| Coating thickness | Holes become tight | Add process allowance |
“Almost correct” is often not correct in assembly.
A small mismatch can turn a smooth product into a headache.
Underestimating real-world usage conditions
Many enclosure designs are reviewed on a clean desk.
Real use is not a clean desk.
The enclosure may be installed in a hot cabinet. It may sit near a machine with vibration. It may be handled by a worker wearing gloves. It may be shipped across the ocean. It may be opened and closed many times. It may be placed near dust, oil, moisture, or sunlight.
This is why real-world usage should be discussed before tooling.
A buyer may say the enclosure is for “indoor use.” But indoor use can mean many things.
| “Indoor use” condition | Risk level |
|---|---|
| Clean office desk | Low |
| Retail display counter | Low to medium |
| Factory control cabinet | Medium |
| Workshop with dust and oil | Medium to high |
| Near a door with moisture | High |
| Warehouse with heat and vibration | High |
The word “indoor” does not tell the full story.
I have seen buyers choose a smooth surface finish because it looked premium. But after real handling, fingerprints and small scratches became too visible. A slightly textured finish would have been better.
I have seen buyers make enclosures compact to save space. But the heat had nowhere to go.
I have seen buyers ignore packaging because the part looked strong. Then the corners got damaged in shipping.
Validation should include the ugly details.
That is where real products live.
And after validation, the next major decision is material. This decision looks simple from outside. But inside the factory, material choice is full of trade-offs.
Why Material Selection Mistakes Start Early
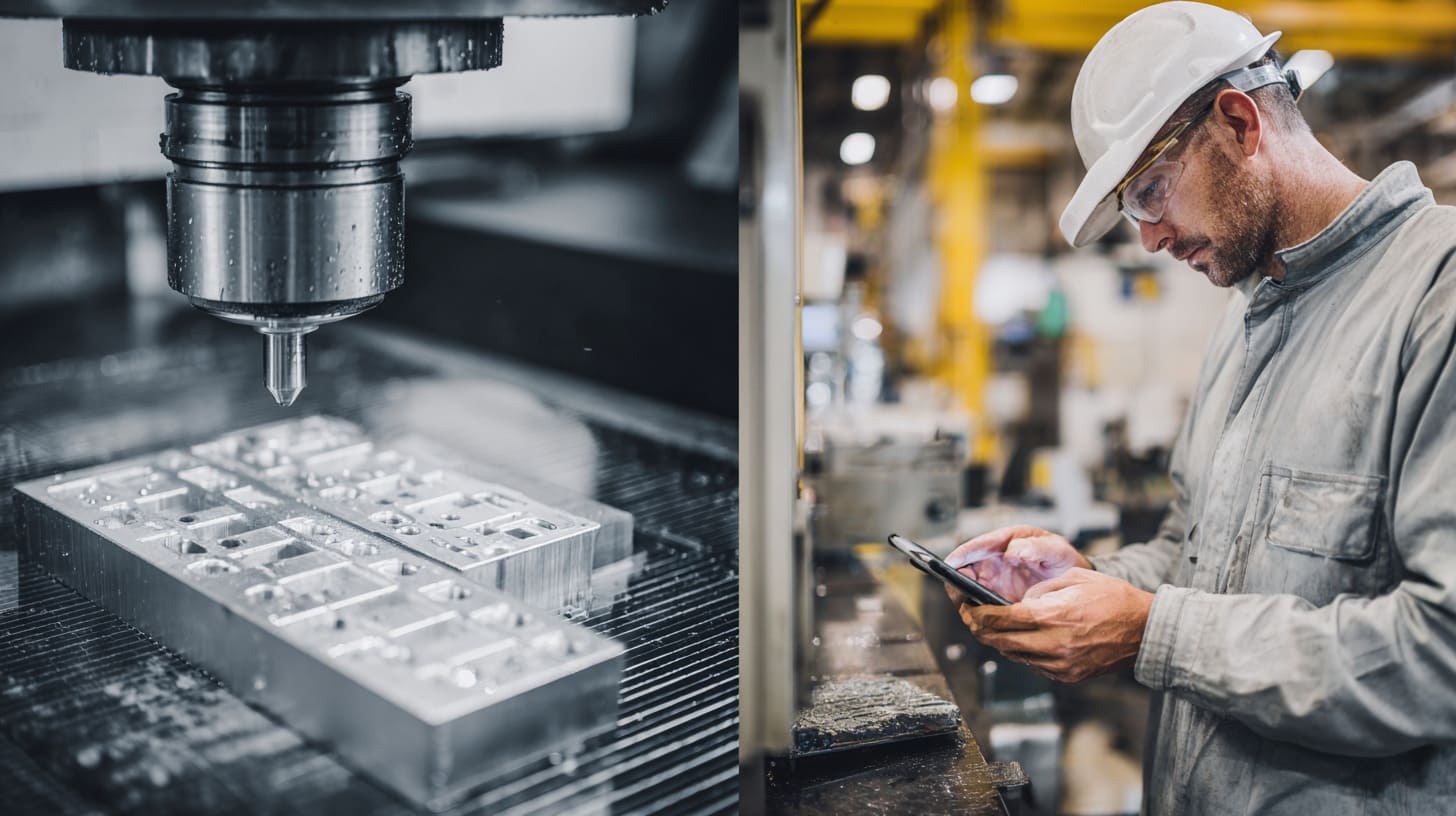
Material selection is one of the earliest decisions in an OEM enclosure project.
It is also one of the most emotional decisions.
Some buyers love aluminum because it feels strong and premium. Some buyers want plastic because it is lighter and cheaper. Some buyers want sheet metal because their product is industrial. Some buyers want stainless steel because they think it means “best quality.”
But material is not about pride.
Material is about fit.
The material must match the product’s heat, environment, strength, appearance, quantity, cost, and user expectation.
I usually become careful when a buyer chooses material based only on appearance, because a beautiful material can still be the wrong material if the working condition does not support it.
Choosing aluminum when plastic is better
Aluminum is popular for OEM enclosures. I understand why.
It looks good. It feels solid. It helps with heat. It can support anodizing, powder coating, CNC machining, extrusion, and die casting. It can also give a product a more professional feeling.
But aluminum is not always the best answer.
Plastic may be better when:
- The product needs lower cost at high volume.
- The enclosure needs lighter weight.
- The internal electronics do not produce much heat.
- The design needs complex snap-fit structures.
- The product needs wireless signal transmission.
- The buyer wants insulation instead of conductivity.
Here is a practical comparison:
| Factor | Aluminum enclosure | Plastic enclosure |
|---|---|---|
| Heat dissipation | Usually better | Usually weaker |
| Weight | Heavier | Lighter |
| Strength feel | Strong and premium | Depends on material and design |
| Wireless signal | Can block signal | Usually better for signal |
| Tooling cost | Depends on process | Can be high for injection molding |
| Unit cost | Good at right volume | Good at high volume |
| Surface options | Anodizing, powder coating, brushing | Texture, color molding, painting |
| Electrical insulation | Conductive | Insulating |
If the customer’s board has Wi-Fi or Bluetooth, aluminum may create signal problems unless the design includes plastic windows or antenna planning.
If the product is handheld, aluminum may feel too heavy.
If the product must be low-cost and high-volume, plastic may win.
So I do not ask, “Which material looks better?”
I ask, “Which material supports the real job of this product?”
Choosing plastic without understanding limitations
Plastic can be excellent. But plastic also has limits.
Some buyers choose plastic because they want lower cost. That is understandable. But if the plastic enclosure faces heat, UV, chemical contact, or mechanical stress, the material must be selected carefully.
Not all plastic is the same.
| Plastic type | Common strength | Common concern |
|---|---|---|
| ABS | Easy to process, good appearance | Heat and UV resistance may be limited |
| PC | Stronger impact resistance | Higher cost, process control needed |
| PC+ABS | Balanced strength and appearance | Still needs correct grade selection |
| Nylon | Good mechanical strength | Moisture absorption can affect dimensions |
| PP | Chemical resistance, low cost | Lower stiffness and surface finish limits |
A buyer may say “plastic enclosure,” but that is only the beginning.
The correct question is:
What kind of plastic?
For what temperature?
For what load?
For what environment?
For what lifetime?
If a plastic enclosure is used near heat, I care about deformation. If it is used outdoors, I care about UV aging. If it is used in an industrial place, I care about impact and chemical contact.
Plastic is not weak by nature.
Bad plastic selection is weak.
Surface treatment decisions made too late
Surface treatment is not decoration only.
It affects cost, lead time, touch feeling, scratch resistance, color consistency, and even assembly.
For aluminum enclosures, common finishes include:
| Finish | Good for | Watch out for |
|---|---|---|
| Anodizing | Clean metallic appearance, corrosion resistance | Color difference between batches |
| Powder coating | Strong color coverage, good protection | Coating thickness affects holes and threads |
| Sandblasting + anodizing | Premium matte look | Surface defects may still show |
| Brushing | Nice directional texture | Scratches can be visible |
| Painting | Flexible color options | Adhesion and durability need control |
| Laser engraving | Durable branding | Contrast depends on finish |
One detail many buyers miss is coating thickness.
If a hole is tight before powder coating, it may become too tight after coating. If the thread is not protected, assembly may become difficult. If the logo position is decided too late, the surface process may need to change.
Color is also tricky.
“Black” can mean many blacks.
Matte black, glossy black, textured black, anodized black, powder-coated black — they can look different. Under different light, they may look even more different.
So surface treatment should not be a last-minute decision.
It should be part of the design review.
Material choice opens the door to another reality. Even when the material is correct, the design may still fight the manufacturing process. That is where many pretty drawings lose their charm.
Why Many OEM Buyers Underestimate Manufacturing Constraints
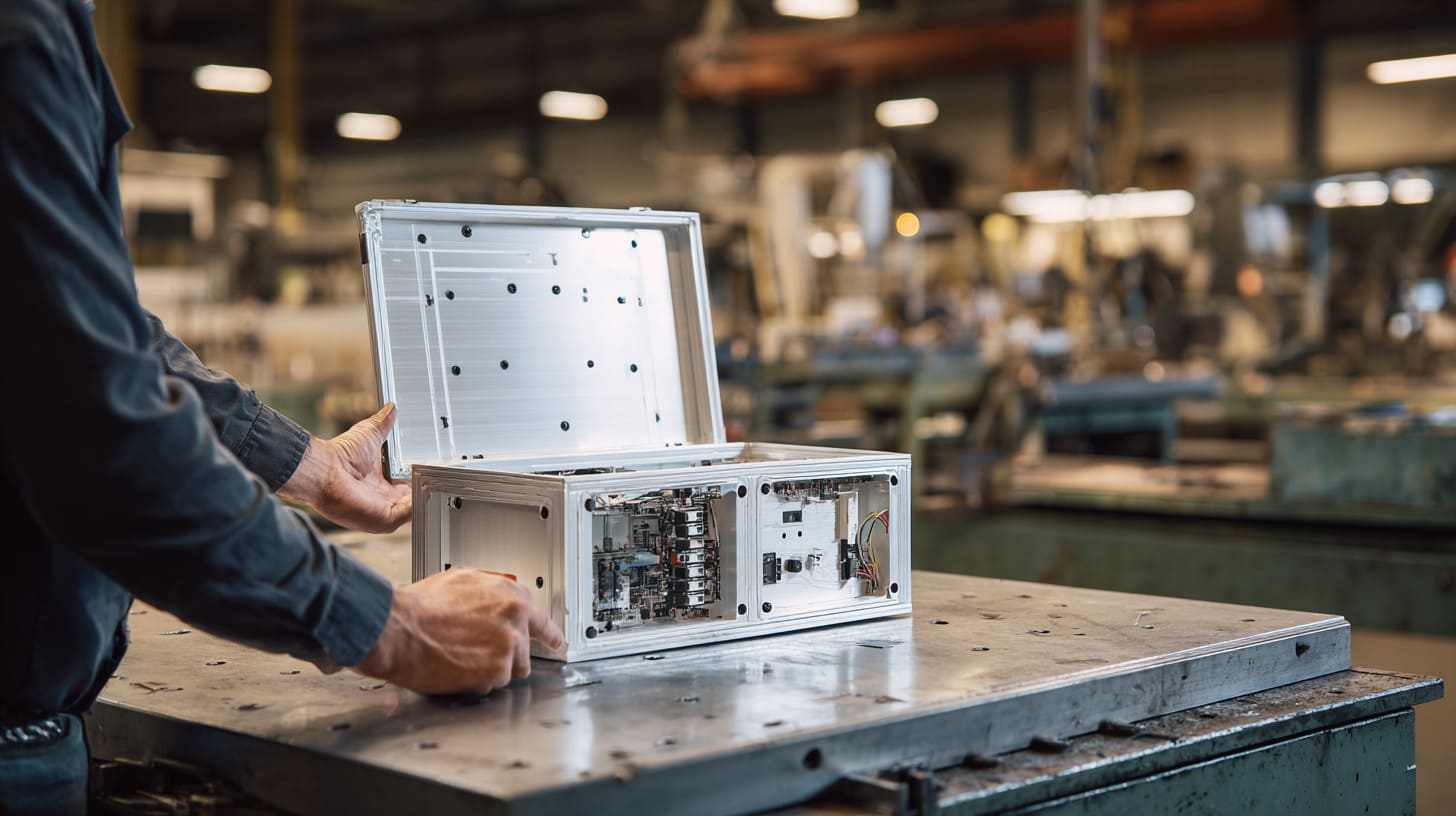
Manufacturing constraints are not enemies.
They are the rules of the road.
A good product design respects them. A risky design ignores them and hopes the factory can “somehow make it work.”
I understand why this happens. A product engineer may focus on function. A designer may focus on appearance. A buyer may focus on price. But the factory must turn that idea into stable parts again and again.
Not once.
Not only for the sample.
Again and again.
My warning light turns on when a design looks beautiful but leaves no room for tools, tolerances, workers, coating, packaging, or future repair.
Designs that look good but cannot be manufactured efficiently
Some enclosure designs look simple on screen but become expensive in production.
The problem is not always that the design is impossible.
Sometimes it is possible, but not efficient.
And inefficient design means higher cost, slower lead time, and unstable quality.
Common examples include:
| Design issue | Why it creates problems |
|---|---|
| Very thin walls | Easy to deform, hard to control, weak structure |
| Deep narrow grooves | Tool access becomes difficult |
| Sharp internal corners | Hard to machine or mold cleanly |
| Too many small features | More machining time and inspection points |
| Hidden screw areas | Assembly becomes slow |
| No draft angle for casting/molding | Tool release becomes difficult |
| Complex undercuts | Tooling becomes more expensive |
A buyer may ask, “Can you make it?”
Many times, the answer is yes.
But the better question is, “Can we make it well, repeatedly, at the target cost?”
That is a different question.
For OEM enclosures, a small design adjustment can reduce cost without hurting function.
For example:
- A slightly larger radius may reduce machining difficulty.
- A small change in wall thickness may improve strength.
- A better screw boss design may reduce cracking.
- A simplified inner rib may improve molding stability.
- A changed parting line may improve surface appearance.
These details are not exciting.
But they protect the project.
Unrealistic cost expectations
Cost pressure is normal.
Every buyer wants a competitive price. I work with buyers from Europe, North America, Japan, and other markets. I know they compare China, Vietnam, local suppliers, and sometimes many factories at the same time.
That is business.
But there is a dangerous kind of cost expectation.
It sounds like this:
“We need high quality, low MOQ, fast delivery, custom logo, special surface finish, tight tolerance, waterproof structure, and a very low price.”
I smile when I hear this.
Not because it is funny.
Because I know the project needs a serious cost discussion.
Custom enclosure cost is not only material. It can include many hidden parts:
| Cost item | Why it matters |
|---|---|
| Engineering review | Reduces design mistakes |
| Tooling | Supports stable production |
| CNC setup | Affects small-batch cost |
| Surface treatment | Adds process time and risk |
| Logo process | Requires positioning and quality control |
| Packaging | Prevents scratches and shipping damage |
| Inspection | Controls dimensions and appearance |
| Rework allowance | Protects delivery stability |
Cheap tooling can become expensive later if it creates unstable parts.
A cheap supplier can become expensive if they do not communicate clearly.
A cheap finish can become expensive if the customer rejects the surface.
Cost is not only the number on the quotation.
Cost is also the risk behind the number.
Ignoring supplier production capability
Not all suppliers are the same.
Some factories are good at CNC aluminum enclosures. Some are better at sheet metal. Some are strong in plastic injection molding. Some are trading companies. Some are small workshops. Some can make a sample but cannot control mass production well.
A buyer may receive five quotations and choose the lowest one.
I understand that temptation.
But for OEM enclosure projects, supplier capability matters as much as price.
Here is how I would compare suppliers:
| Capability | Why it matters |
|---|---|
| Engineering review ability | Finds problems before tooling |
| Process experience | Reduces trial-and-error cost |
| Quality control system | Keeps batch quality stable |
| Communication speed | Prevents slow confirmation loops |
| Surface treatment control | Reduces appearance defects |
| Packaging experience | Prevents shipping damage |
| OEM/ODM experience | Helps with custom details and future revisions |
A factory should not only make what the buyer asks.
A good factory should also notice what the buyer may have missed.
That is especially important for customers like David or John.
David may be experienced and direct. He wants speed, quality, and competitive pricing. He may lose patience if details are delayed.
John may be creative and open to suggestions. He may need more support from the supplier to turn an idea into a real product.
Both need a supplier who can think with them.
Not only quote.
Not only produce.
Think.
And this brings us to the better side of the story. Problems can start before tooling, yes. But smart buyers can also prevent most of them before tooling.
How Experienced OEM Buyers Prevent Problems Before Tooling

Experienced OEM buyers do not avoid problems because they are lucky.
They avoid many problems because they ask better questions earlier.
They also know something important: moving slower at the beginning can make the whole project faster.
This may sound strange, but I see it often.
A buyer who sends complete files, confirms the application clearly, accepts engineering feedback, and leaves time for review often moves faster than a buyer who only pushes for price and tooling.
The first buyer may spend three more days before tooling.
The second buyer may lose three weeks after tooling.
When I judge an OEM buyer’s project maturity, I look less at how polished the drawing looks and more at how clearly the buyer explains the real use condition, the assembly method, and the future risk they want to avoid.
Sharing complete project information early
A complete project file does not need to be fancy.
It needs to be useful.
For an OEM enclosure project, I like to receive:
- 2D drawings with key dimensions
- 3D files
- PCB layout or dummy board dimensions
- Connector models or datasheets
- Logo file
- Surface finish requirements
- Quantity plan
- Target application
- Environmental requirements
- Packaging needs
- Special test or certification needs
The best customers do not hide information.
They understand that the supplier cannot protect a project they do not understand.
Here is a simple file checklist:
| File or information | Why I need it |
|---|---|
| 3D model | To check structure and assembly |
| 2D drawing | To confirm critical dimensions and tolerances |
| PCB file or dummy board size | To check mounting and connector alignment |
| Connector datasheet | To check cutouts and cable clearance |
| Logo file | To confirm branding process |
| Application photo or sketch | To understand real use |
| Quantity forecast | To suggest the right process |
| Finish sample or color code | To reduce appearance misunderstanding |
One small detail here can save the project.
For example, if I know the customer plans a future board upgrade, I may suggest leaving a little more internal space. If I know the enclosure will be mounted on a wall, I may suggest stronger mounting points. If I know the customer needs Amazon-style retail packing, I may suggest scratch protection from the start.
Good information gives the factory better eyes.
Working closely with factory engineers
Factory engineers are not just people who “check drawings.”
They are people who see manufacturing risk every day.
They know which corners may crack. They know which surface may show scratches. They know which screw design may loosen. They know which tolerance may become trouble after coating.
So I always encourage buyers to let factory engineers join the discussion early.
A design-for-manufacturing review can cover:
| Review area | Key question |
|---|---|
| Structure | Is the enclosure strong enough and easy to assemble? |
| Material | Does the material fit heat, strength, and environment needs? |
| Process | Is the chosen process suitable for volume and tolerance? |
| Surface | Will the finish stay stable and acceptable? |
| Tolerance | Are important holes and mating parts safe? |
| Cost | Can we simplify without hurting function? |
| Packaging | Can the surface survive shipping? |
A good engineering review may feel like criticism.
It is not.
It is protection.
When a factory engineer says, “This wall is risky,” they are not trying to make the design ugly. They are trying to keep the part from failing later.
When they say, “This hole needs more clearance,” they are not being difficult. They are thinking about real assembly.
This is why I respect buyers who listen and discuss.
The best projects are not one-way orders.
They are conversations.
Building realistic project timelines
A rushed timeline can turn a normal project into a stressful project.
Many buyers only count production days.
But an OEM enclosure project also needs time for:
- Engineering review
- Drawing revision
- Quotation adjustment
- Prototype production
- Sample testing
- Feedback
- Tooling design
- Tooling modification
- Surface treatment confirmation
- Packaging confirmation
- Final approval
If the timeline ignores these steps, the project becomes fragile.
Here is a simple timeline view:
| Stage | Common purpose | Risk if skipped |
|---|---|---|
| Initial review | Understand design and use | Wrong quotation or missed risk |
| Engineering feedback | Improve manufacturability | Tooling change later |
| Prototype | Check fit and appearance | Product failure after tooling |
| Sample testing | Confirm real function | Hidden user problems |
| Tooling | Prepare mass production | Expensive if design is not stable |
| Trial run | Check production stability | Batch defects |
| Final approval | Lock standard | Disputes later |
A realistic timeline is not slow.
It is honest.
It gives the project room to breathe.
And in manufacturing, breathing room is not a luxury. It is often the difference between a smooth launch and a painful delay.
Still, buyers cannot do everything alone. A reliable OEM enclosure supplier must also carry responsibility before tooling begins.
What a Reliable OEM Enclosure Supplier Should Do Before Tooling

A reliable supplier should not behave like a quotation machine.
A quotation machine only receives a drawing and returns a price.
That is not enough for OEM enclosure work.
Custom enclosures involve material, structure, tolerance, surface treatment, assembly, branding, packaging, and shipping. If the supplier does not review these details, the buyer may think the project is safe when it is not.
From my side, I believe a supplier earns trust before tooling, not after the problem appears.
When I look at a new OEM enclosure project, I feel responsible for pointing out the uncomfortable details early, even if that makes the first conversation a little slower.
Review manufacturability before quoting
A reliable supplier should review manufacturability before giving a serious quotation.
A fast price with no review may look efficient. But it can be misleading.
Before quoting, the supplier should check:
- Is the structure suitable for the selected process?
- Are the wall thicknesses reasonable?
- Are the screw posts strong enough?
- Are the holes and cutouts manufacturable?
- Is the finish suitable for the shape?
- Is the tolerance realistic?
- Is the MOQ suitable for the process?
- Is tooling really needed, or can another method work first?
Here is a simple example.
If a customer needs only 100 pieces of a custom aluminum enclosure, CNC machining may be better than opening die-cast tooling. But if the customer needs 10,000 pieces per year, tooling may make more sense.
The supplier should not push tooling only because tooling is profitable.
The supplier should suggest what fits the project.
| Buyer situation | Better supplier thinking |
|---|---|
| Low quantity trial order | Avoid high tooling cost if possible |
| High volume stable design | Consider tooling for long-term cost |
| Design still changing | Prototype first, delay tooling |
| Tight deadline | Choose process with lower development risk |
| High appearance requirement | Confirm finish sample before mass production |
A good supplier protects the buyer’s money.
That matters.
Provide engineering feedback instead of only pricing
Price matters. I know that clearly.
But for OEM enclosure projects, engineering feedback often matters more than the first price.
A low price with poor engineering support can lead to expensive changes later.
Useful supplier feedback should include:
| Feedback type | Example |
|---|---|
| Material recommendation | “Aluminum is better here because the board has heat.” |
| Cost-saving suggestion | “This internal pocket can be simplified to reduce CNC time.” |
| Process advice | “This shape is better for extrusion than CNC.” |
| Assembly warning | “The screw position may interfere with the connector.” |
| Surface treatment warning | “Powder coating may make this tight hole difficult.” |
| Packaging advice | “This brushed surface needs protective film and separated packing.” |
I like to give feedback in plain words.
Not only technical language.
Because many buyers are not only engineers. Some are company owners. Some are purchasing managers. Some are product designers. Some are re-brand sellers who care about final customer experience.
Good feedback should help them make decisions.
It should not make them feel stupid.
Create clear approval processes
Approval is not just saying “OK.”
Approval should define what is being accepted.
For OEM enclosure projects, clear approval can prevent many disputes.
The process may include:
- Drawing confirmation
- Material confirmation
- Surface finish confirmation
- Logo position confirmation
- Prototype approval
- Functional test approval
- Packaging approval
- Mass production sample approval
Each approval should leave a record.
Not because people do not trust each other.
Because people forget.
Projects often last weeks or months. Different people join the discussion. A buyer may change one detail in email. A factory engineer may update a drawing. A salesperson may send a sample photo. Without a record, confusion grows quietly.
Here is a practical approval table:
| Approval item | What should be checked | Record method |
|---|---|---|
| Drawing | Size, holes, tolerance, structure | Signed PDF or confirmed file |
| Material | Grade, thickness, color | Quotation and specification |
| Surface finish | Texture, gloss, color | Sample photo or physical sample |
| Logo | Size, position, process | Artwork proof |
| Prototype | Fit, assembly, appearance | Sample approval report |
| Packaging | Protection, carton, label | Packing photo or spec |
| Mass production | Batch standard | Golden sample or inspection criteria |
For custom enclosure projects, I like the idea of a “golden sample.”
It gives both sides a clear reference. The buyer knows what to expect. The factory knows what to control.
Without this reference, words like “good quality” become too soft.
And soft words are dangerous in production.
Conclusion
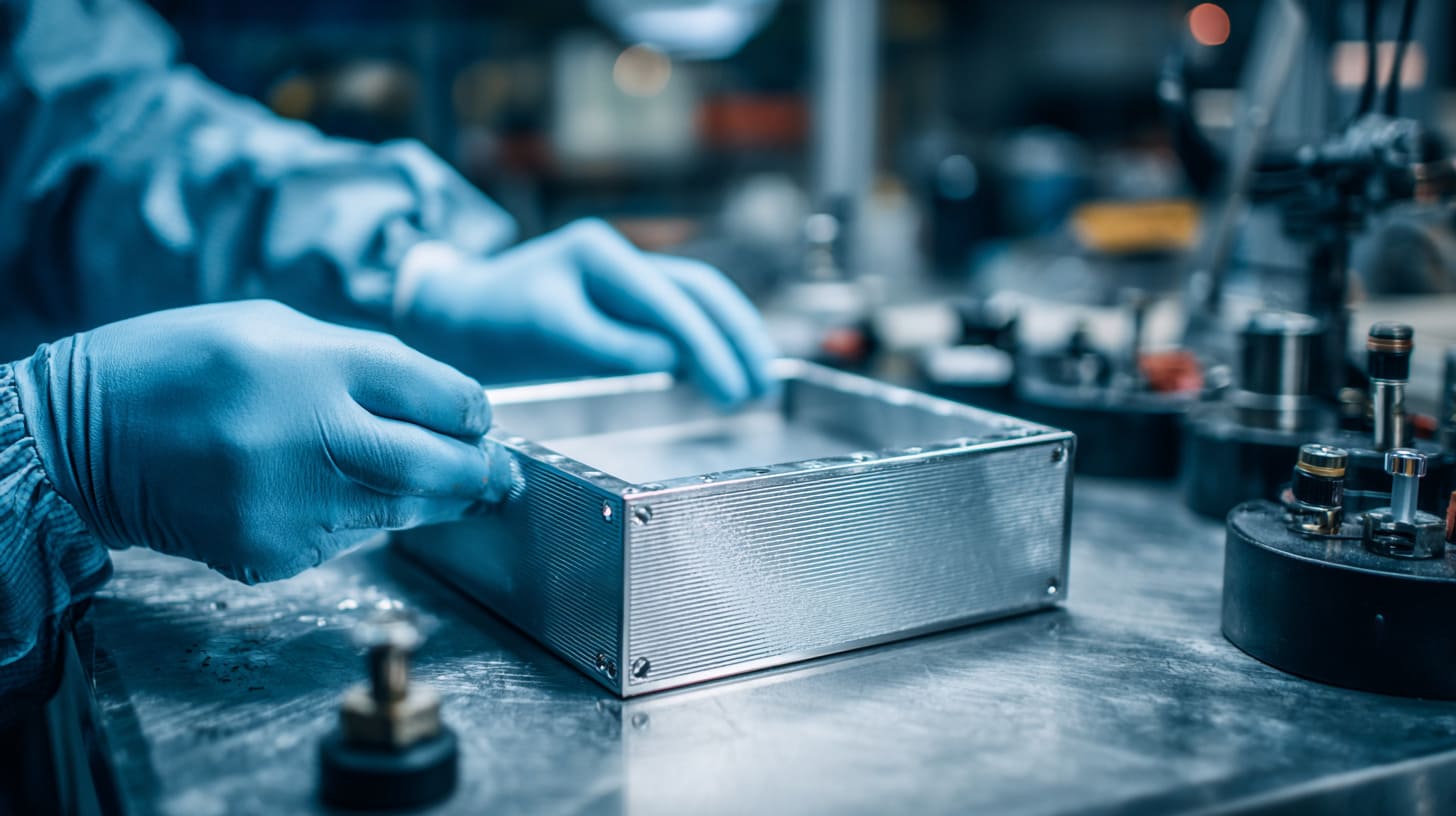
Most OEM enclosure problems do not suddenly appear when tooling begins.
They usually start earlier.
They start when the application is not explained clearly.
They start when the drawing looks finished but has not been checked for real production.
They start when the buyer asks for speed before the factory understands the risk.
They start when the supplier quotes too quickly and does not ask enough questions.
They start when both sides think, “We can fix it later.”
But later is expensive.
Later may mean tooling modification.
Later may mean a delayed launch.
Later may mean the customer loses patience.
Later may mean the final product looks fine but does not work well in real use.
This is why I care so much about the work before tooling.
I do not think early engineering review is a slow step. I think it is the step that keeps the project from becoming slow later.
I do not think asking many questions is annoying. I think it is a sign that the factory is paying attention.
I do not think the cheapest quotation is always the best start. I think the best start is a clear project, a realistic process, and a supplier who is willing to speak honestly before mistakes become metal, plastic, or tooling steel.
At MaidaTech, I work with buyers who need custom aluminum enclosures, plastic enclosures, sheet metal enclosures, Raspberry Pi-style cases, and other OEM enclosure solutions. Many of them already have drawings. Some only have an idea. Some know exactly what they want. Some need factory support to make the idea practical.
My view is simple.
A good enclosure project should not begin with blind tooling.
It should begin with clear questions.
What is inside the enclosure?
Where will it be used?
How will users handle it?
What process fits the quantity?
What material fits the risk?
What detail can fail later?
What can we improve now before it costs more?
That is why I believe most OEM enclosure problems can be reduced before tooling begins.
Not by luck.
Not by slogans.
By careful engineering communication, honest review, and practical decisions made early.
If you are planning a custom OEM enclosure project and you already have a drawing, a sample, or even only a product idea, you can send the details to us for review. I will not only look at the price. I will help check the structure, material, process, surface finish, and possible risks before the project goes too far.
You can contact MaidaTech at info@maidatech.com or visit maidatechenclosure.com to discuss your custom enclosure project.







